The 5-minute quick start
Updated
From installed to a working inventory and your first trip checklist.
GearCache holds three kinds of thing: items you own, locations where they live, and checklists for trips. All of it sits on your device — no setup, no waiting for anything to load. This guide walks you from a clean install to a working setup in about five minutes.
1. Add your first location#
Locations are where stuff actually lives — they nest, so each item can sit at the right level of detail. Open the Locations tab. On a fresh install you’ll see an empty list with an Add Location button; once you have a few locations, that action moves to the + in the top-right.
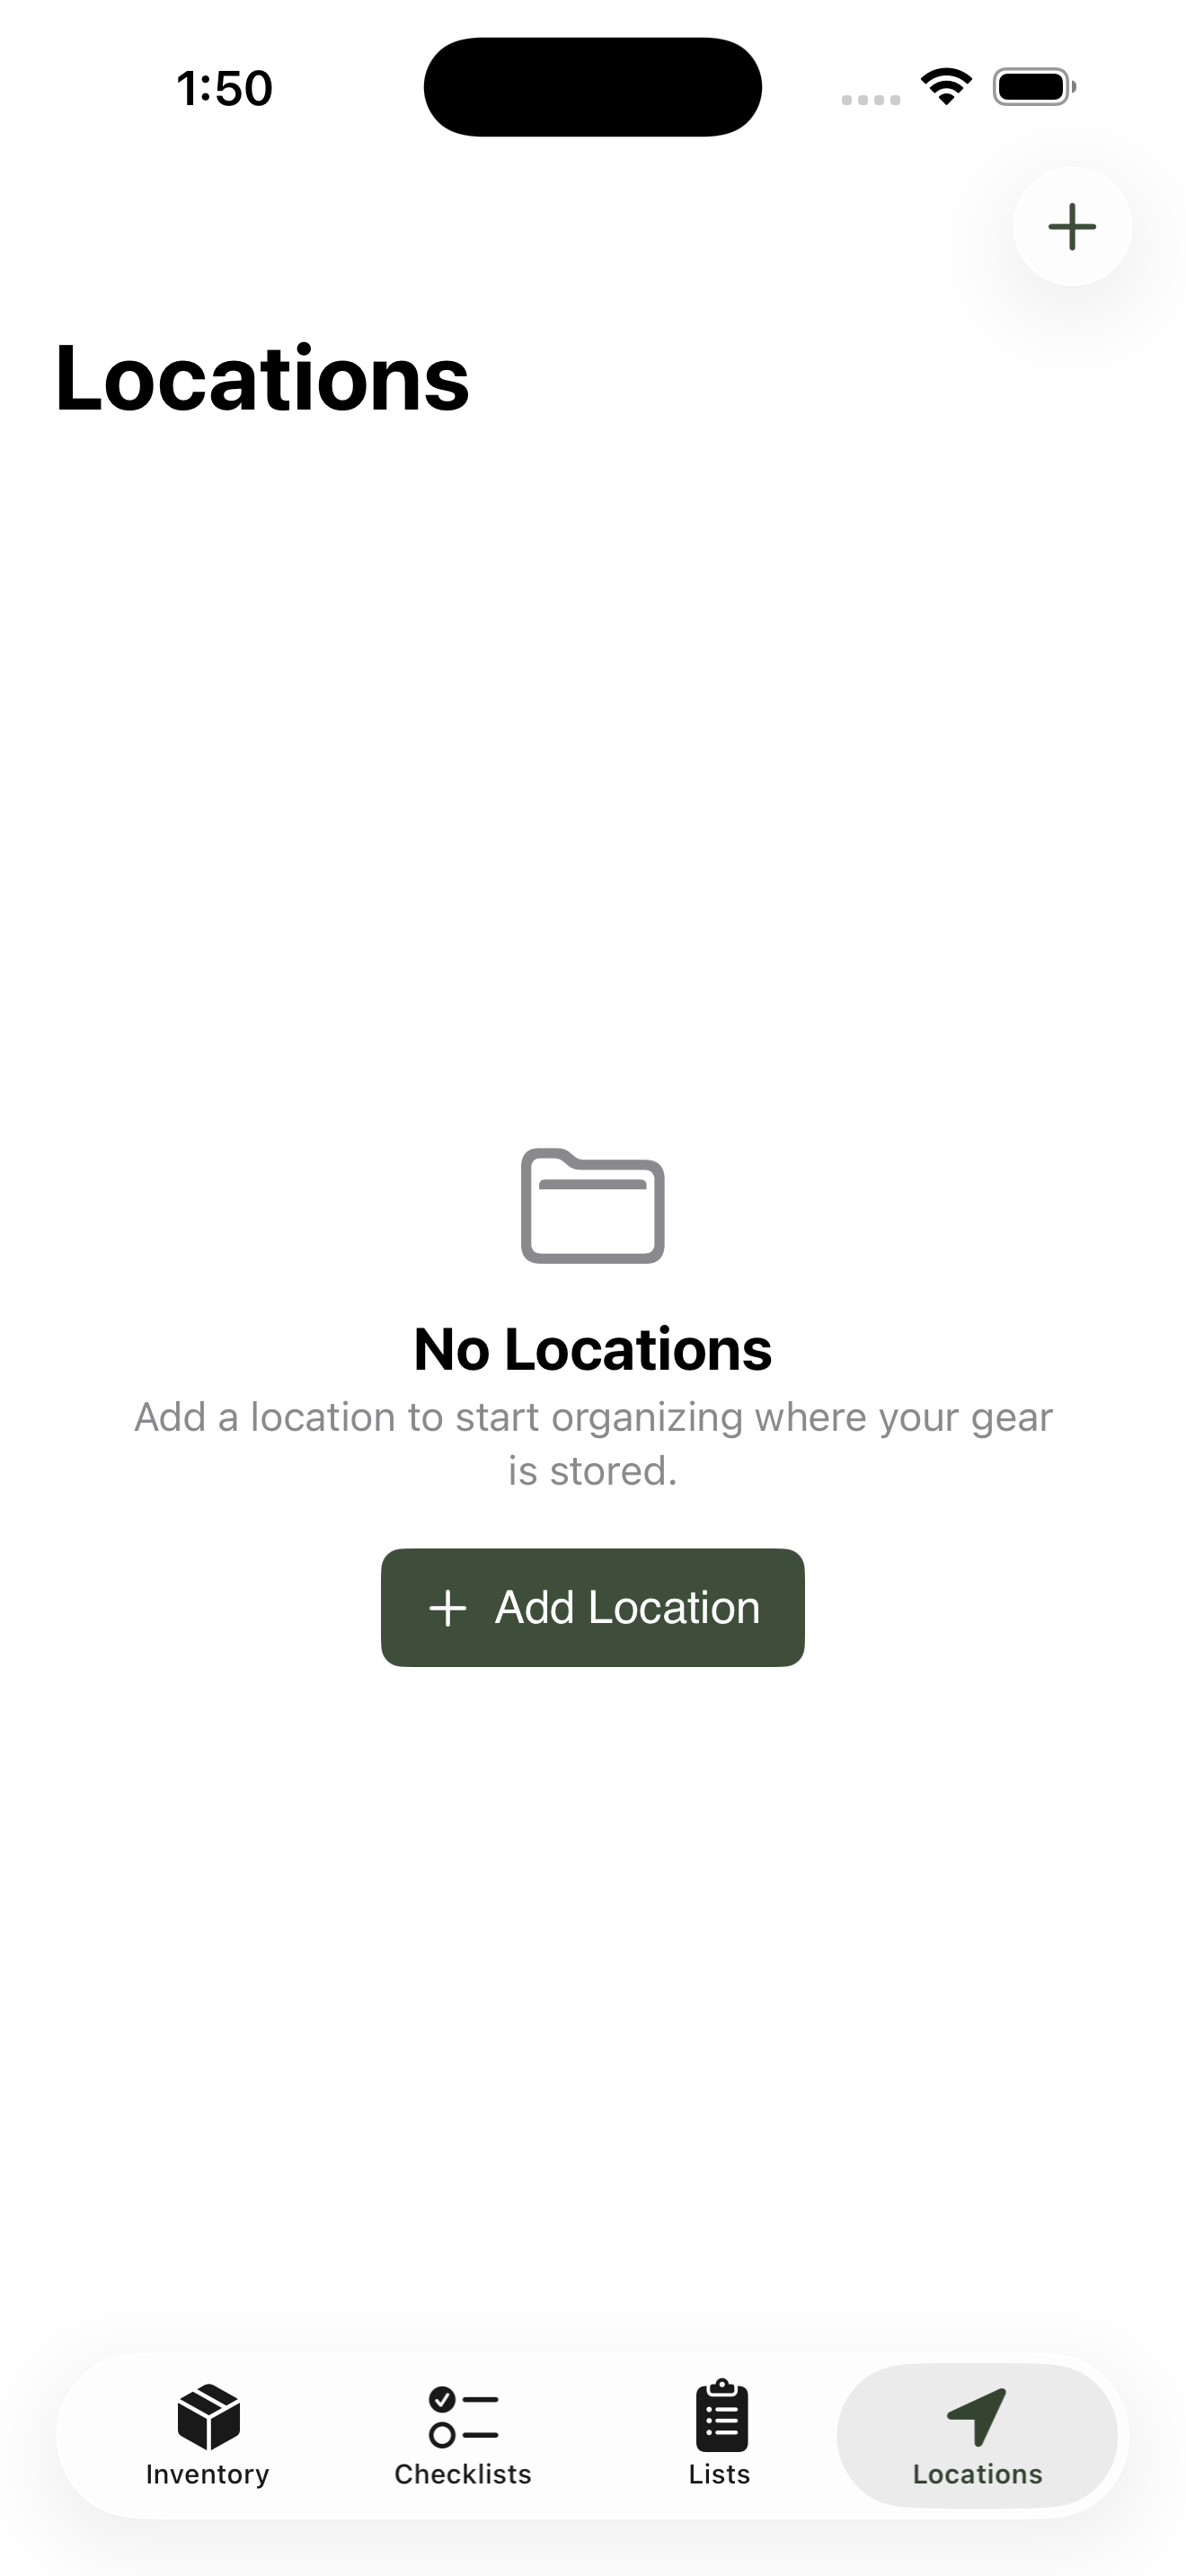
Locations on first launch — tap Add Location to start.
Add your first top-level container — most people start with Trailer, Garage, or Car — and save. Back on the Locations list, tap the location you just made to open it. Inside, you’ll see another empty list and the same + button — which now adds a child location under the one you’re standing in.
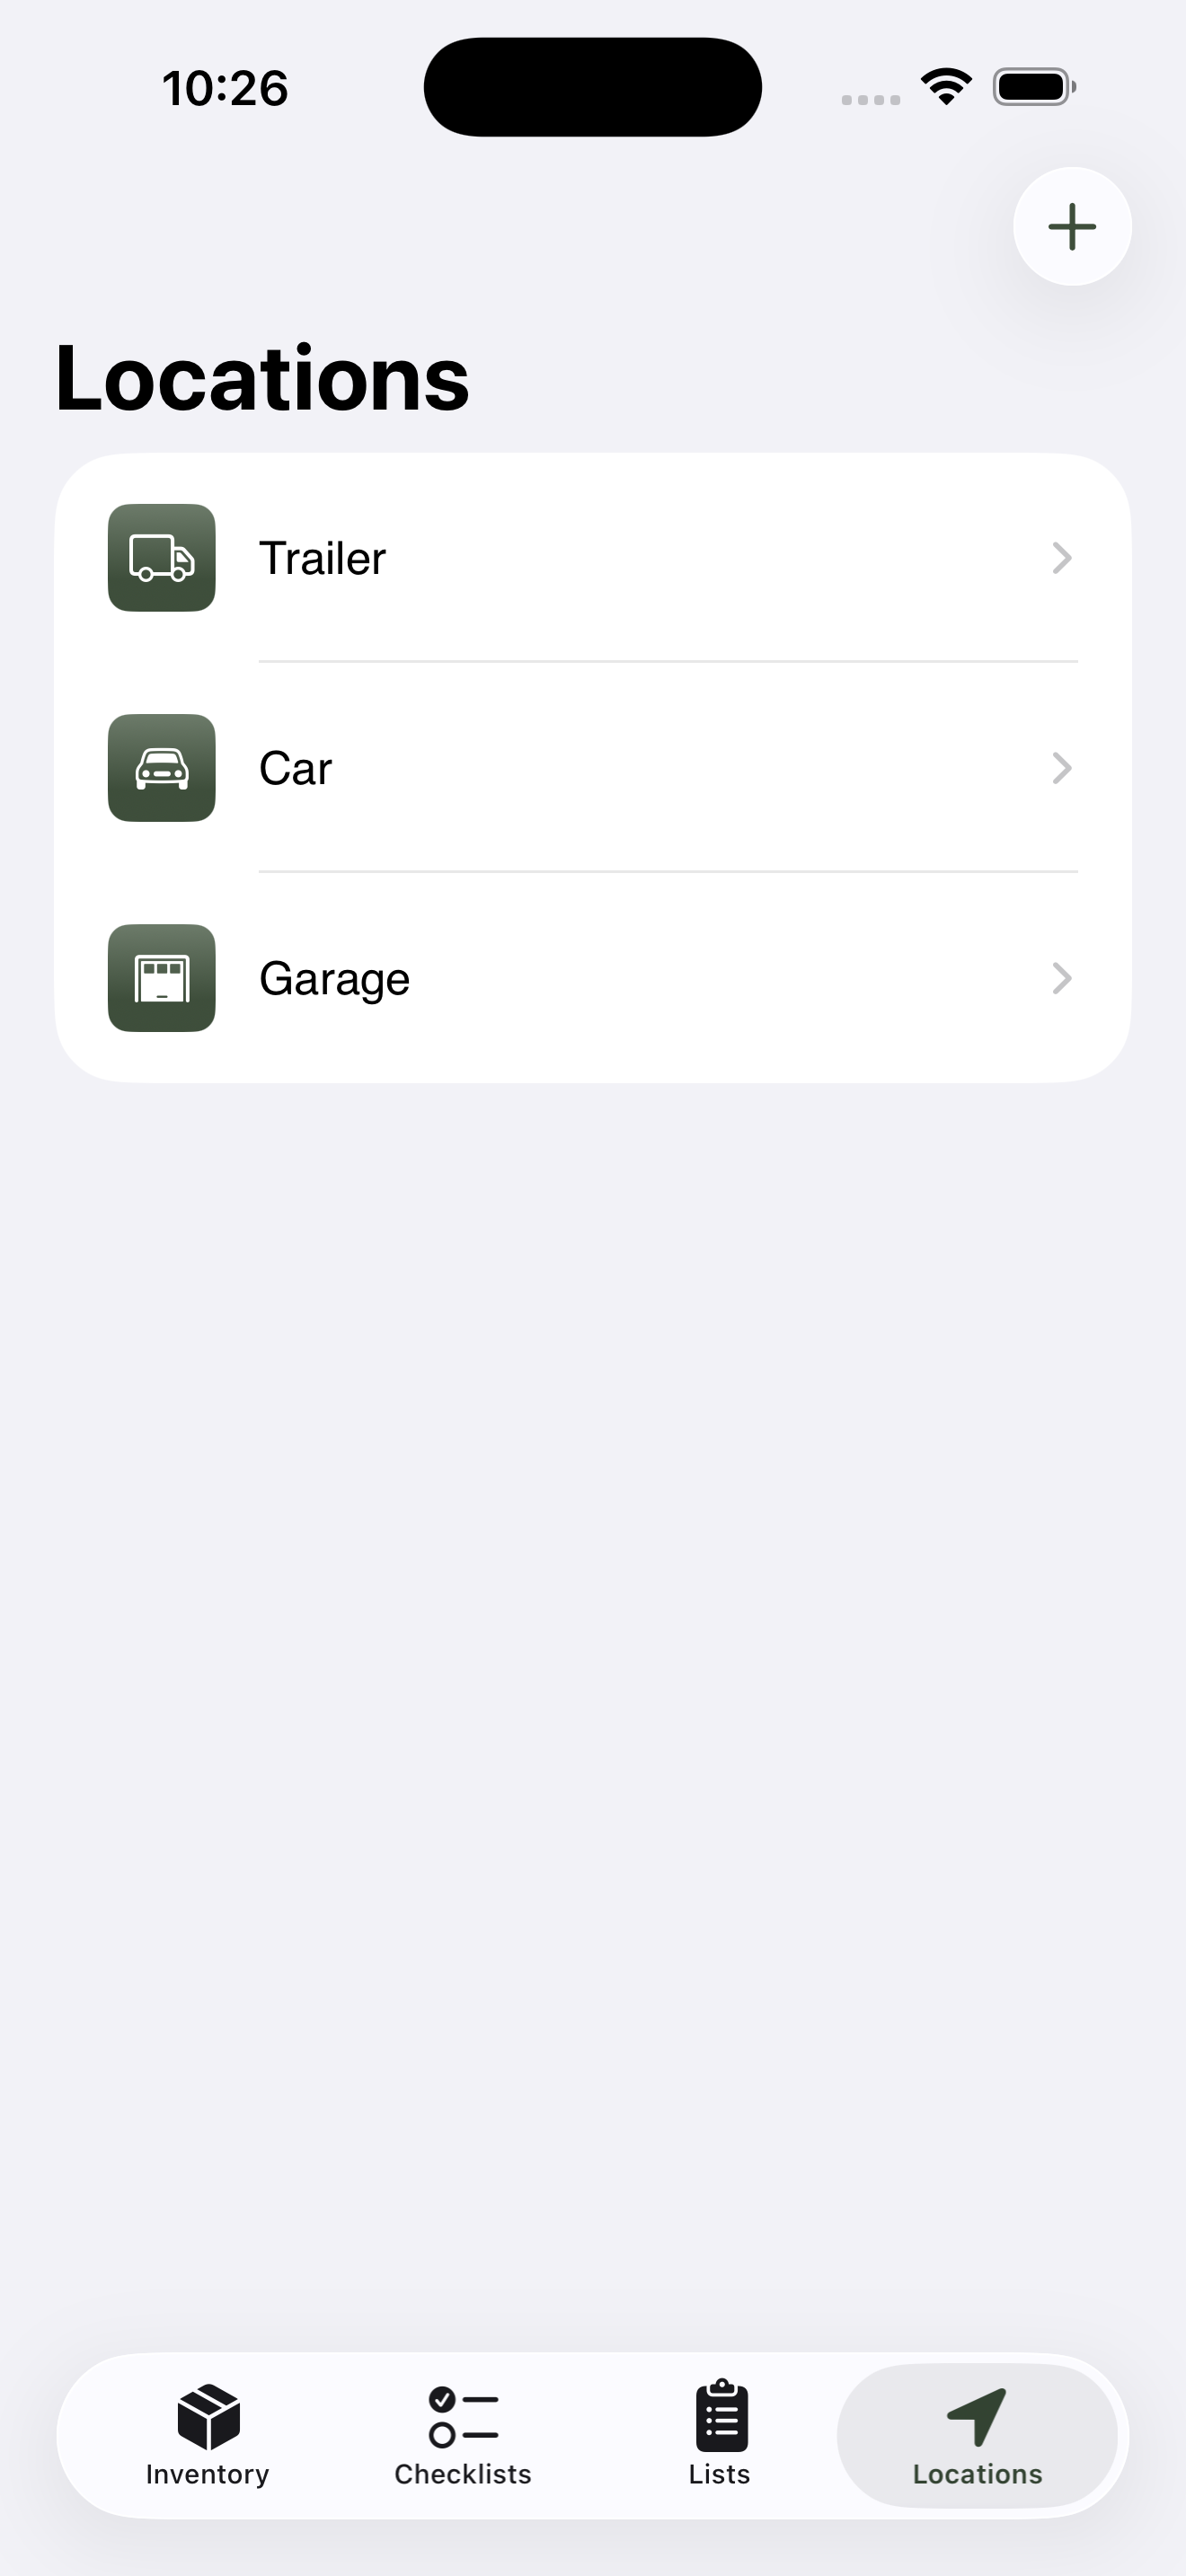
The top-level list shows top-level locations only; tap any row to drill in.
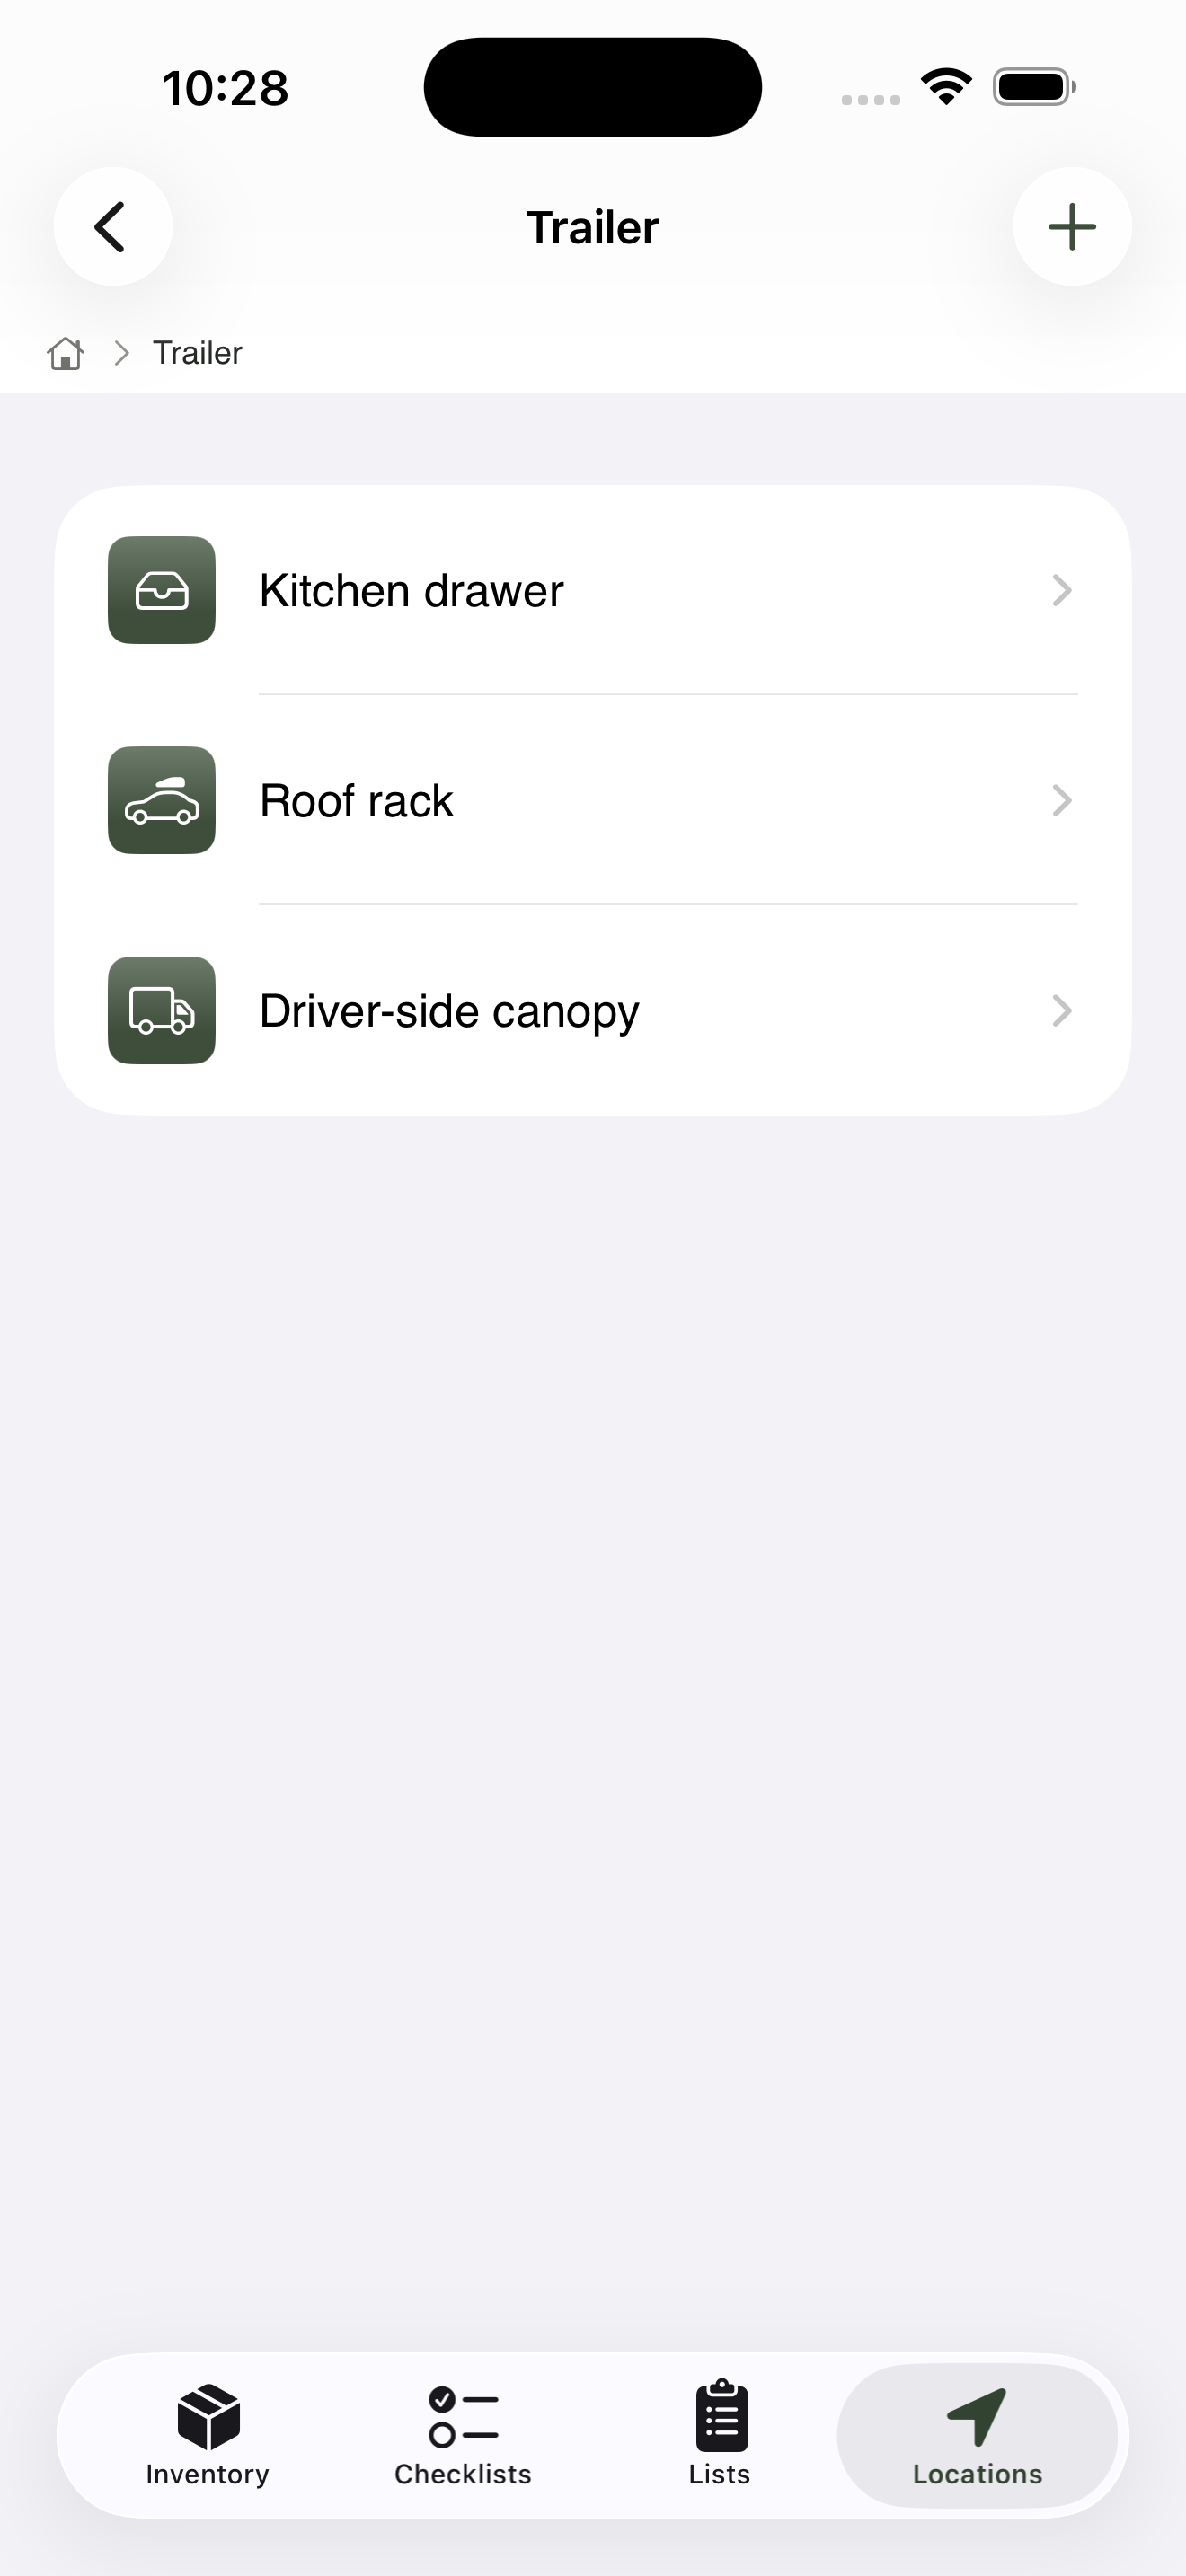
Once you’ve drilled in, the same + button now adds a child of where you’re standing.
A useful starter shape, built one tap at a time:
Trailer
├── Kitchen drawer
├── Roof rack
└── Driver-side canopy
The screen doesn’t show the whole tree at once — you navigate through it the way you’d dig through a real cupboard. Tap to drill in, swipe back to come out.
Don’t sweat the structure now. You can rename, reorder, or move locations later, and items follow.
2. Add your first item#
Items in GearCache always live inside a category — Kitchen, Shelter, Tools, that kind of thing. Categories are how you’ll browse most of the time, so the Inventory tab opens to a list of categories rather than a list of items.
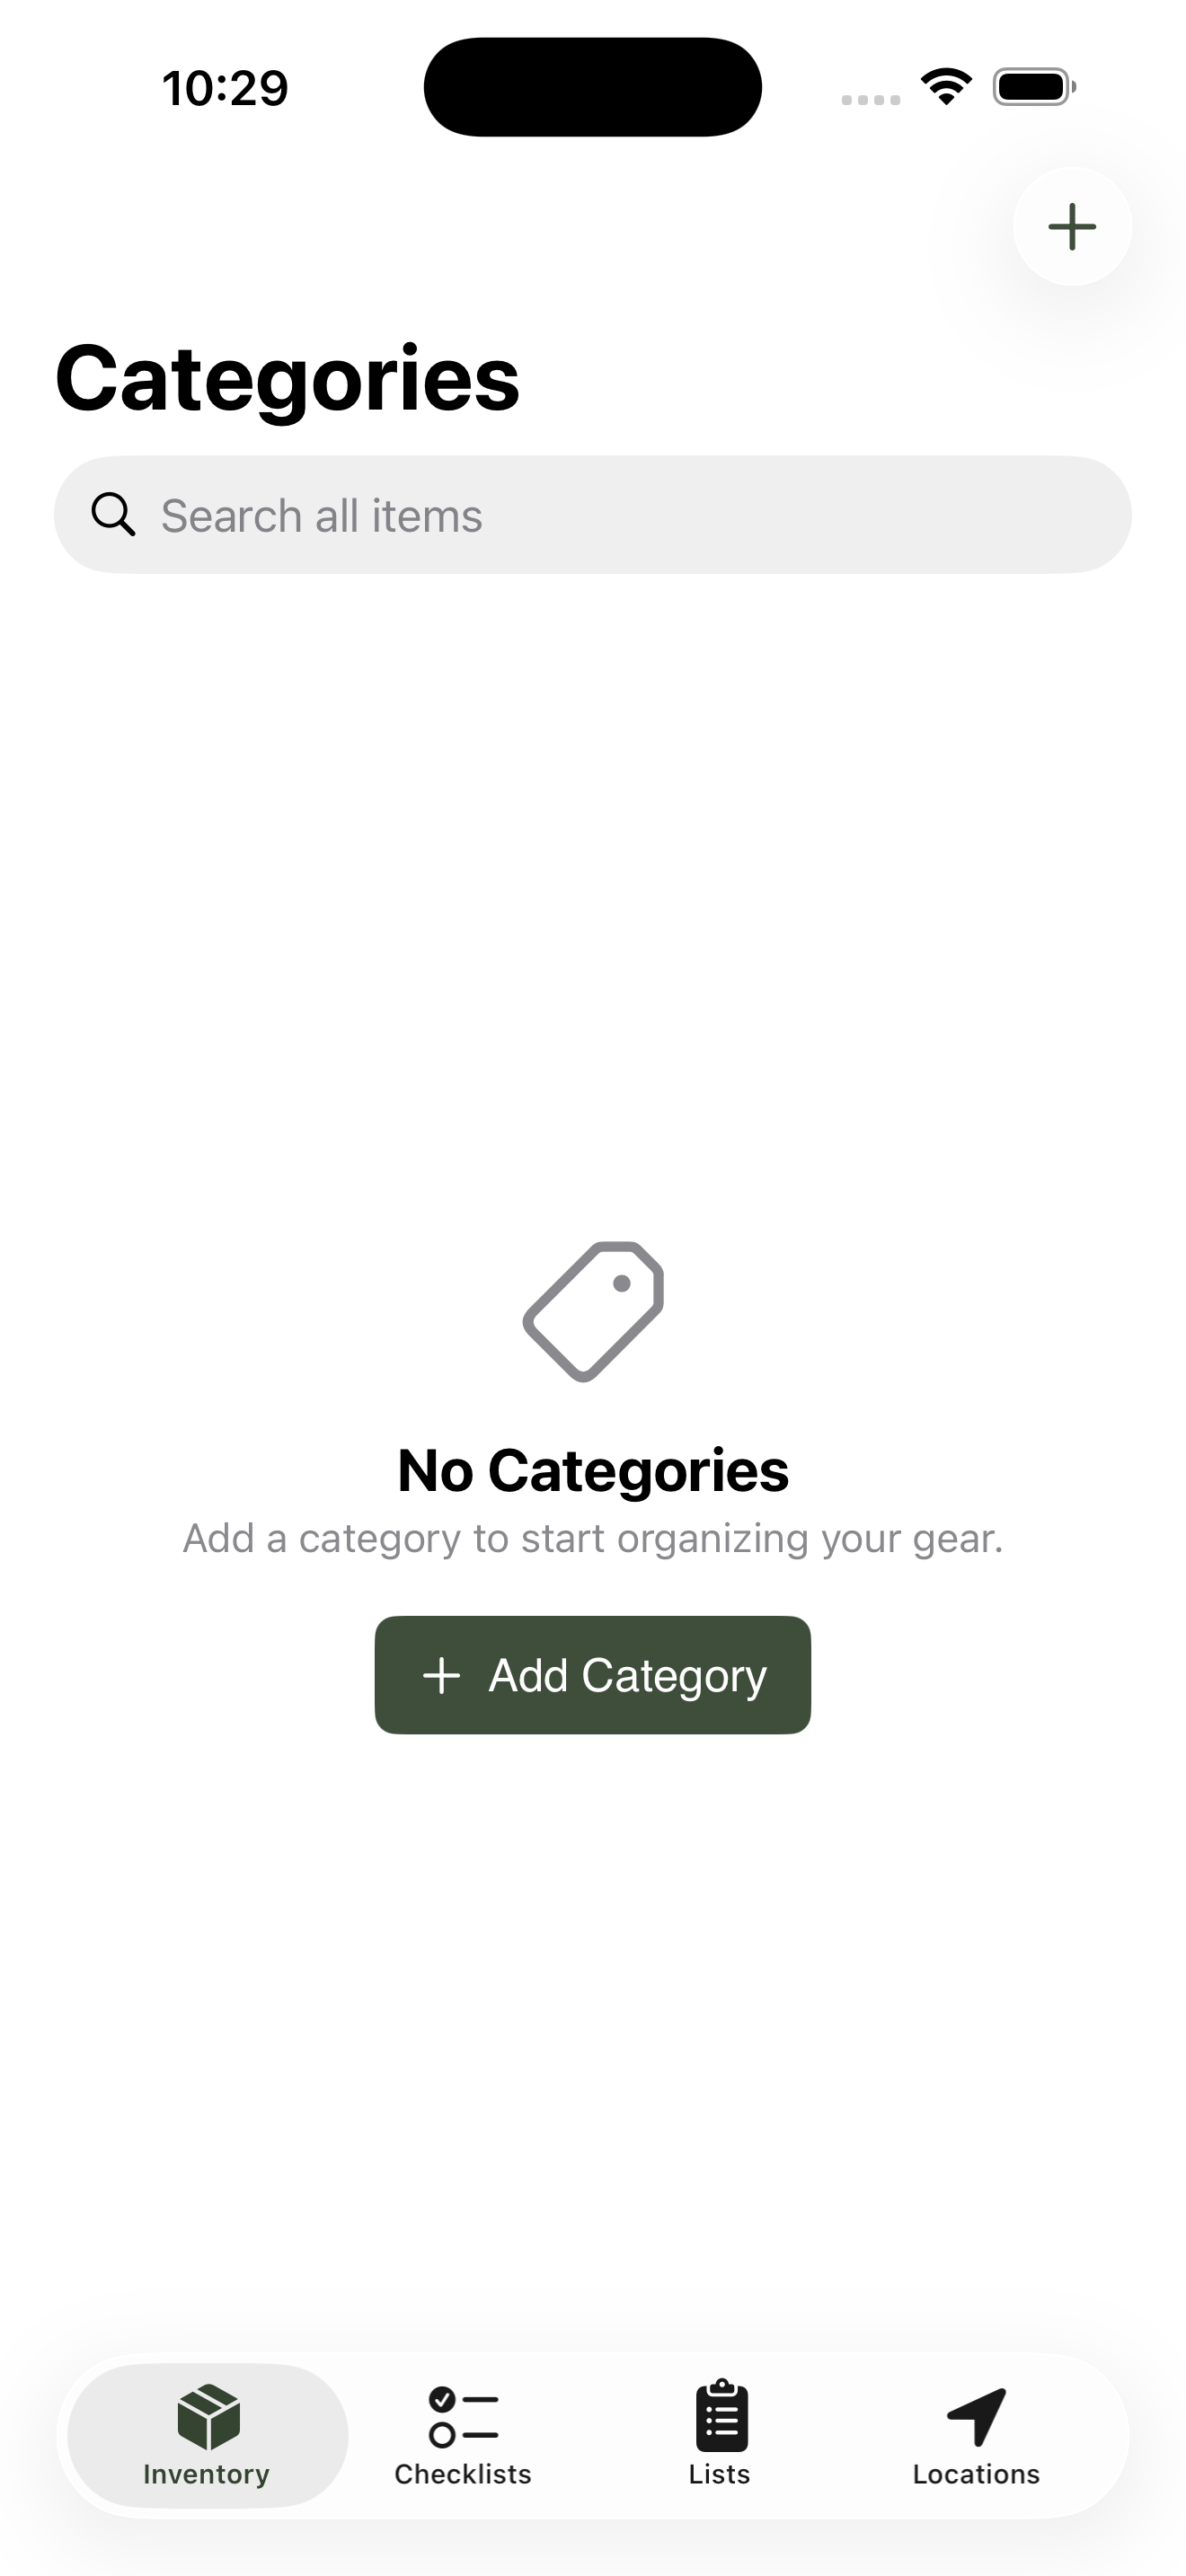
The Inventory tab opens to your category list, not a flat list of items.
On a fresh install the category list is empty, so the first thing to add is a category. Tap Add Category (or the + button in the top-right once you have a few). Keep it broad — Kitchen is a fine first one — pick an icon and a colour, and save.
Now tap the category you just made to open it. Inside, you’ll see an empty list of items and another + button. Tap it to add your first item, and fill in:
-
Name — what you call it day to day.
Camp stove,First aid kit,Gas canister. - Usually lives in — pick the spot you made in step 1. If it’s already in the trailer, tell GearCache.
-
Condition —
good,fair,needs maintenance,needs replacement,expired, orconsumed. - Photo (optional) — under Photos, tap Add Photo and choose Take Photo or Choose from Library. Helpful when you’re rummaging in a dim canopy at 5am.
The Category field is filled in for you — that’s the one you opened to get here. You can change it from inside the form if you have other categories to switch to.
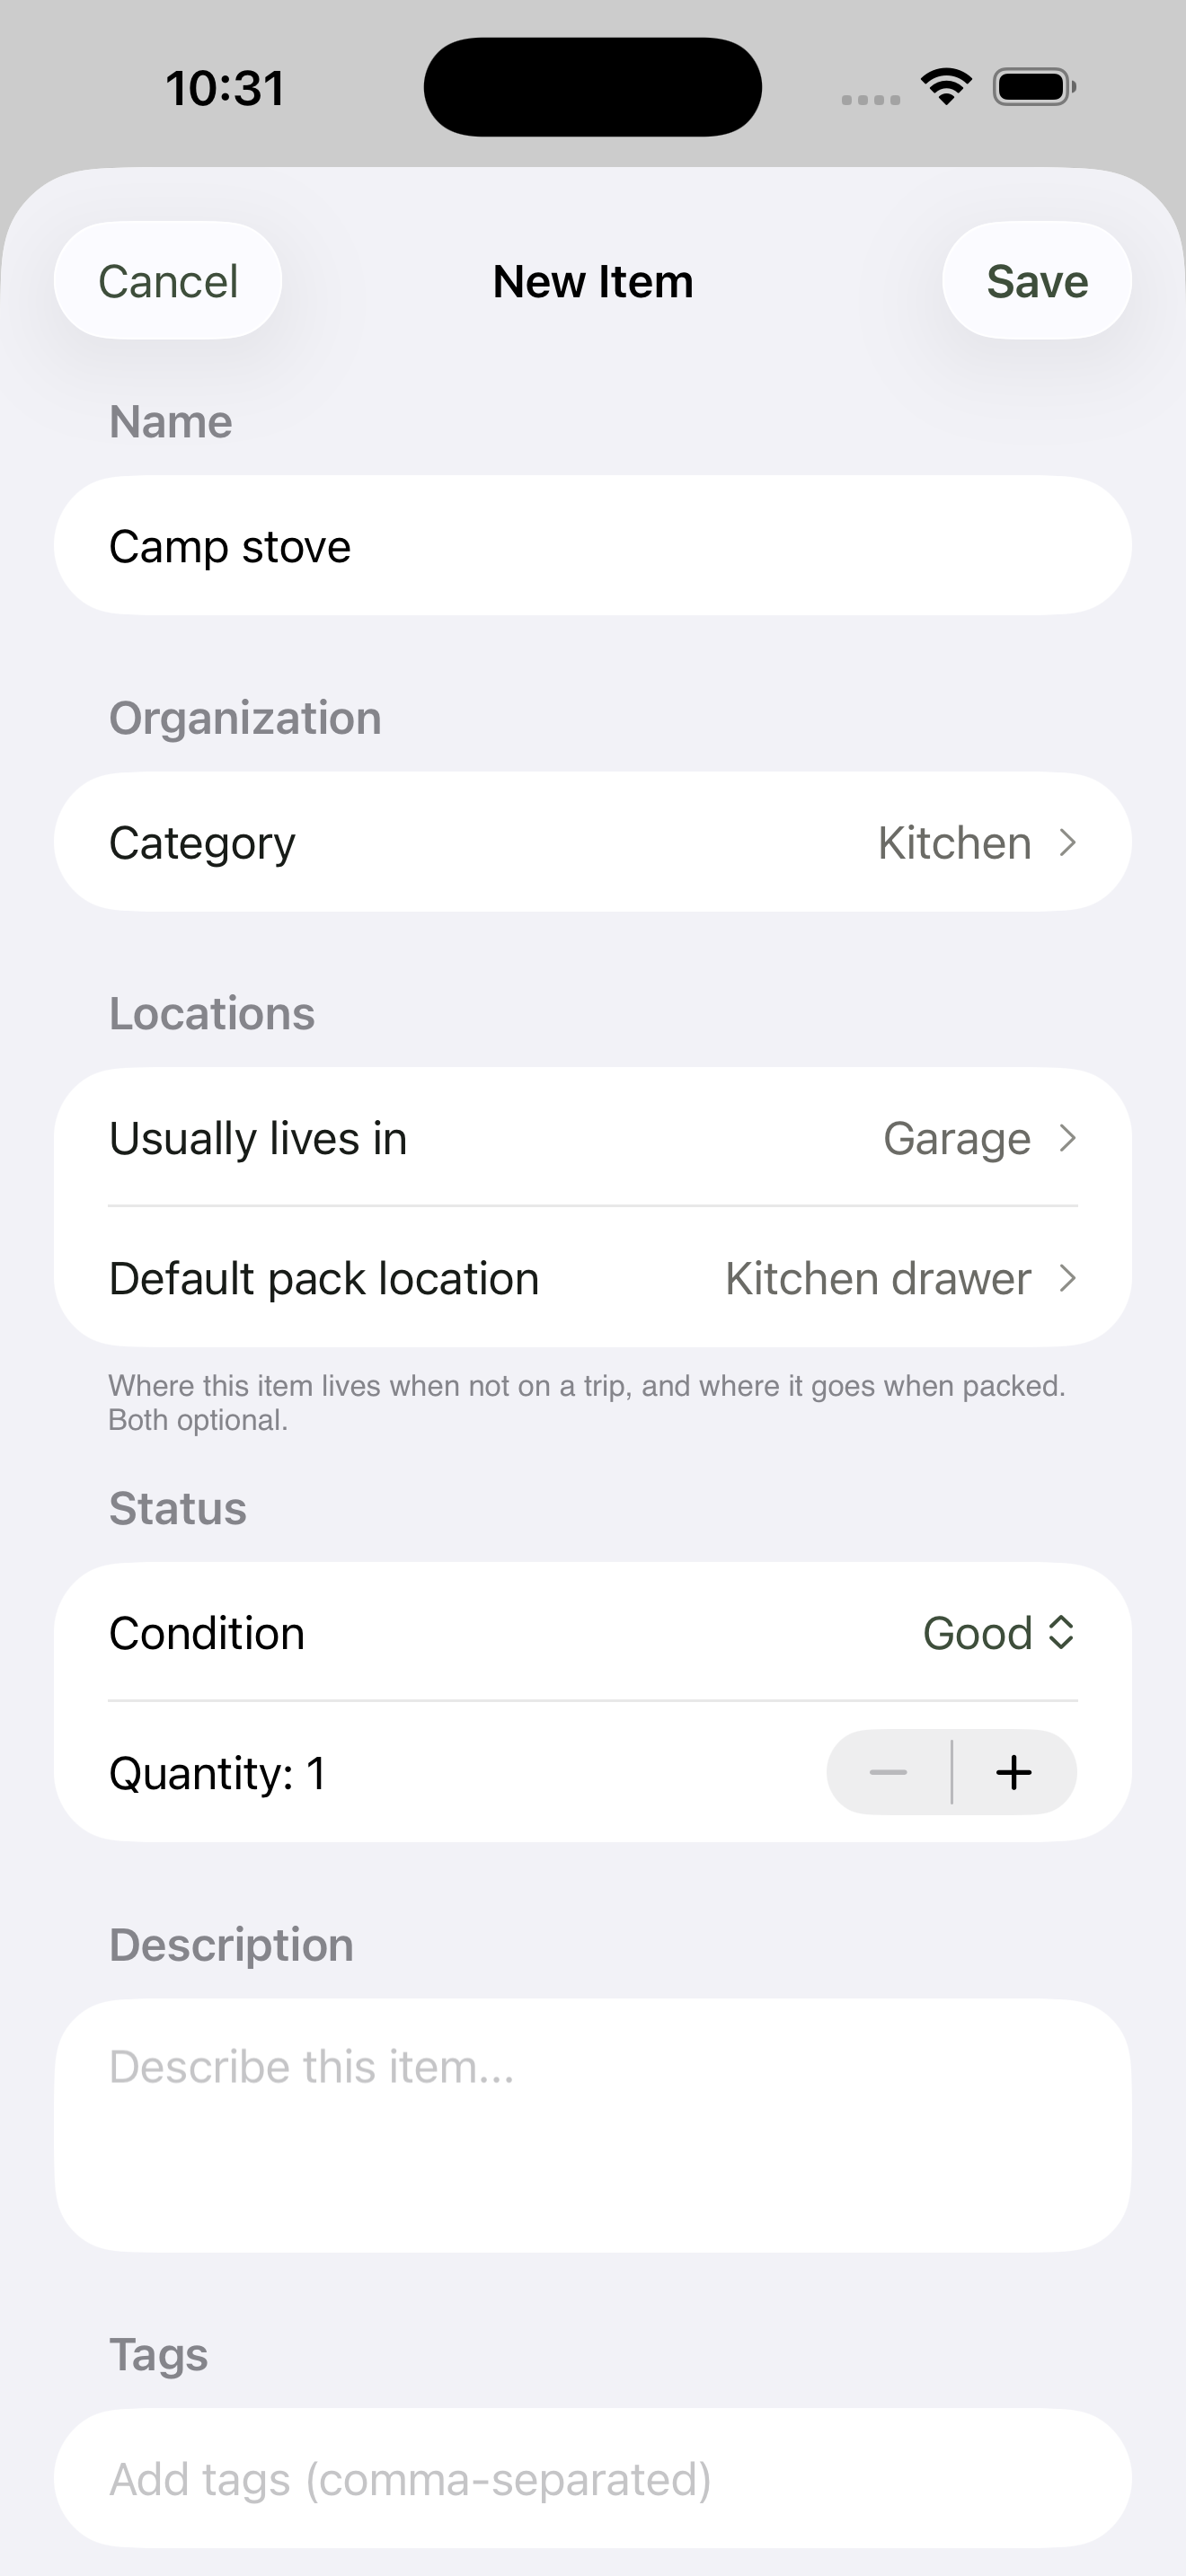
Adding Camp stove from inside the Kitchen category — the Category field is pre-filled.
Save. Your first item is in.
3. Add a few more items#
Resist the urge to organise perfectly. Just keep adding what’s around you — five minutes of breadth-first item entry beats thirty minutes of category bikeshedding. Aim for ten or so things across two or three locations before moving on.
You can always come back and tighten things up. Tags (next to category in the item form) are great for cross-cutting labels like essential, fragile, or weekend-only once you have a feel for what you actually have.
4. Make a trip checklist#
Checklists are how GearCache pays you back for the inventory work. Open the Checklists tab and tap Add Checklist on the empty state (or the + button once you have a few).
Give it a name — Easter camping trip or whatever — and a departure date if you know it. That’s the whole form; save, and the new checklist opens.

Two fields: name and an optional departure date. That’s it.
Tap Add items, browse by category or search, and pull in the things you’ll need. Each row shows where the item currently lives — from Trailer > Kitchen drawer, say — handy when you’re working out what to grab from where.
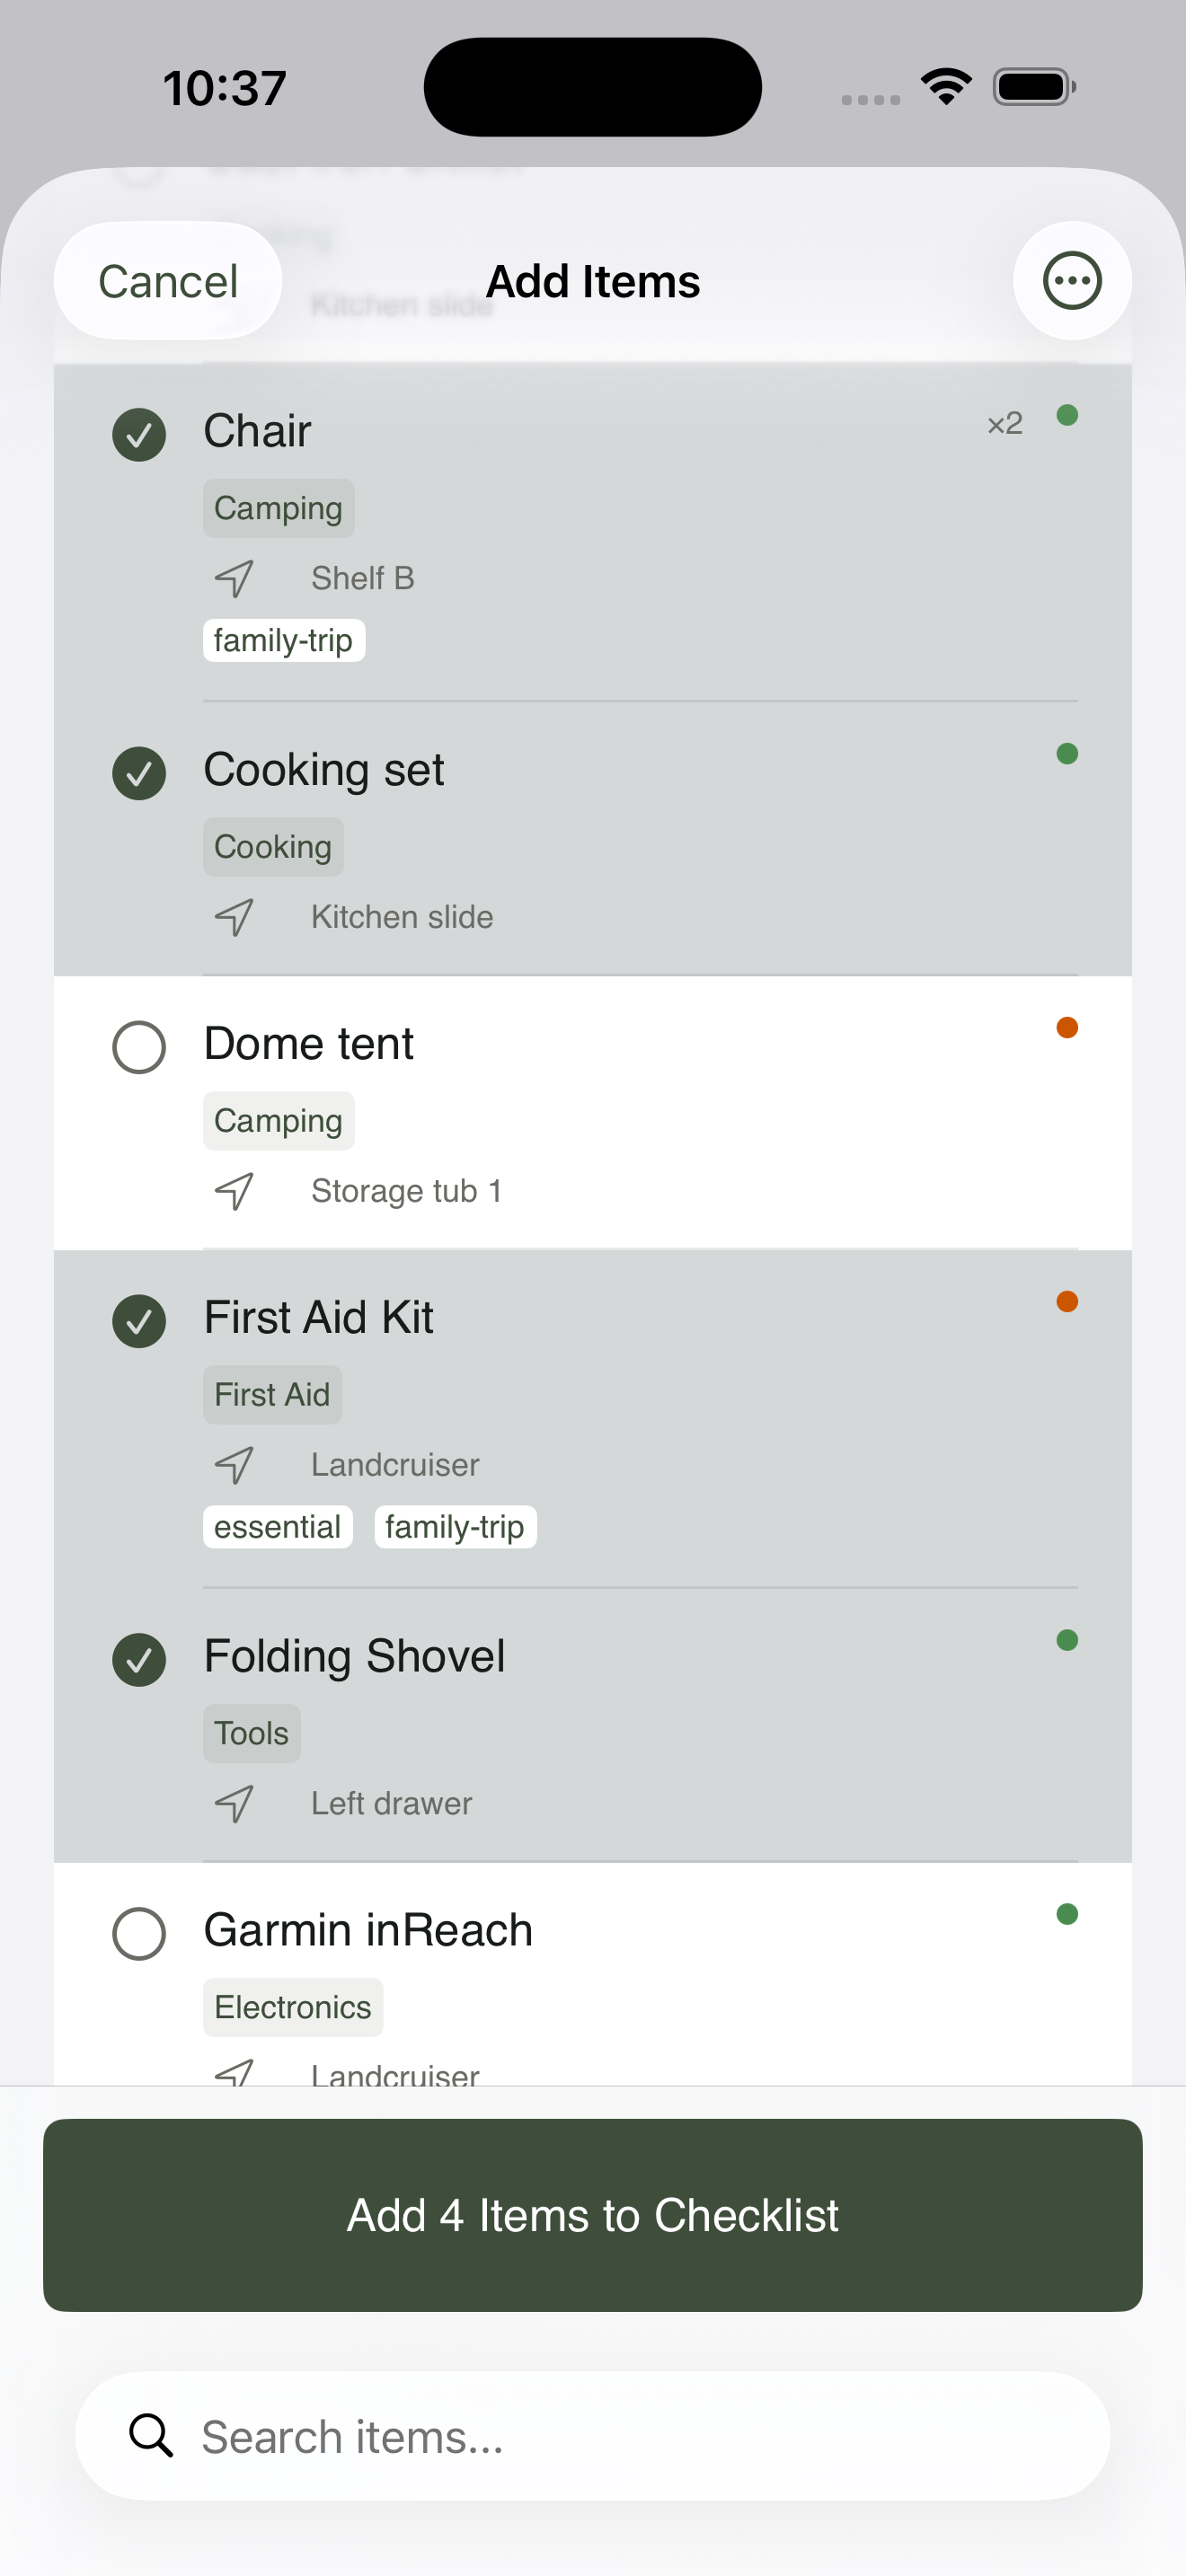
Each row tells you where the item currently lives so you know where to grab it from.
5. Smart packing in action#
Walk through the list and check each item off as you load it. Every item starts unchecked, even ones that already live in the trailer — GearCache trusts you to confirm the actual physical state, not assume it. As you check items, they cross off and pick up a chip showing where they ended up.
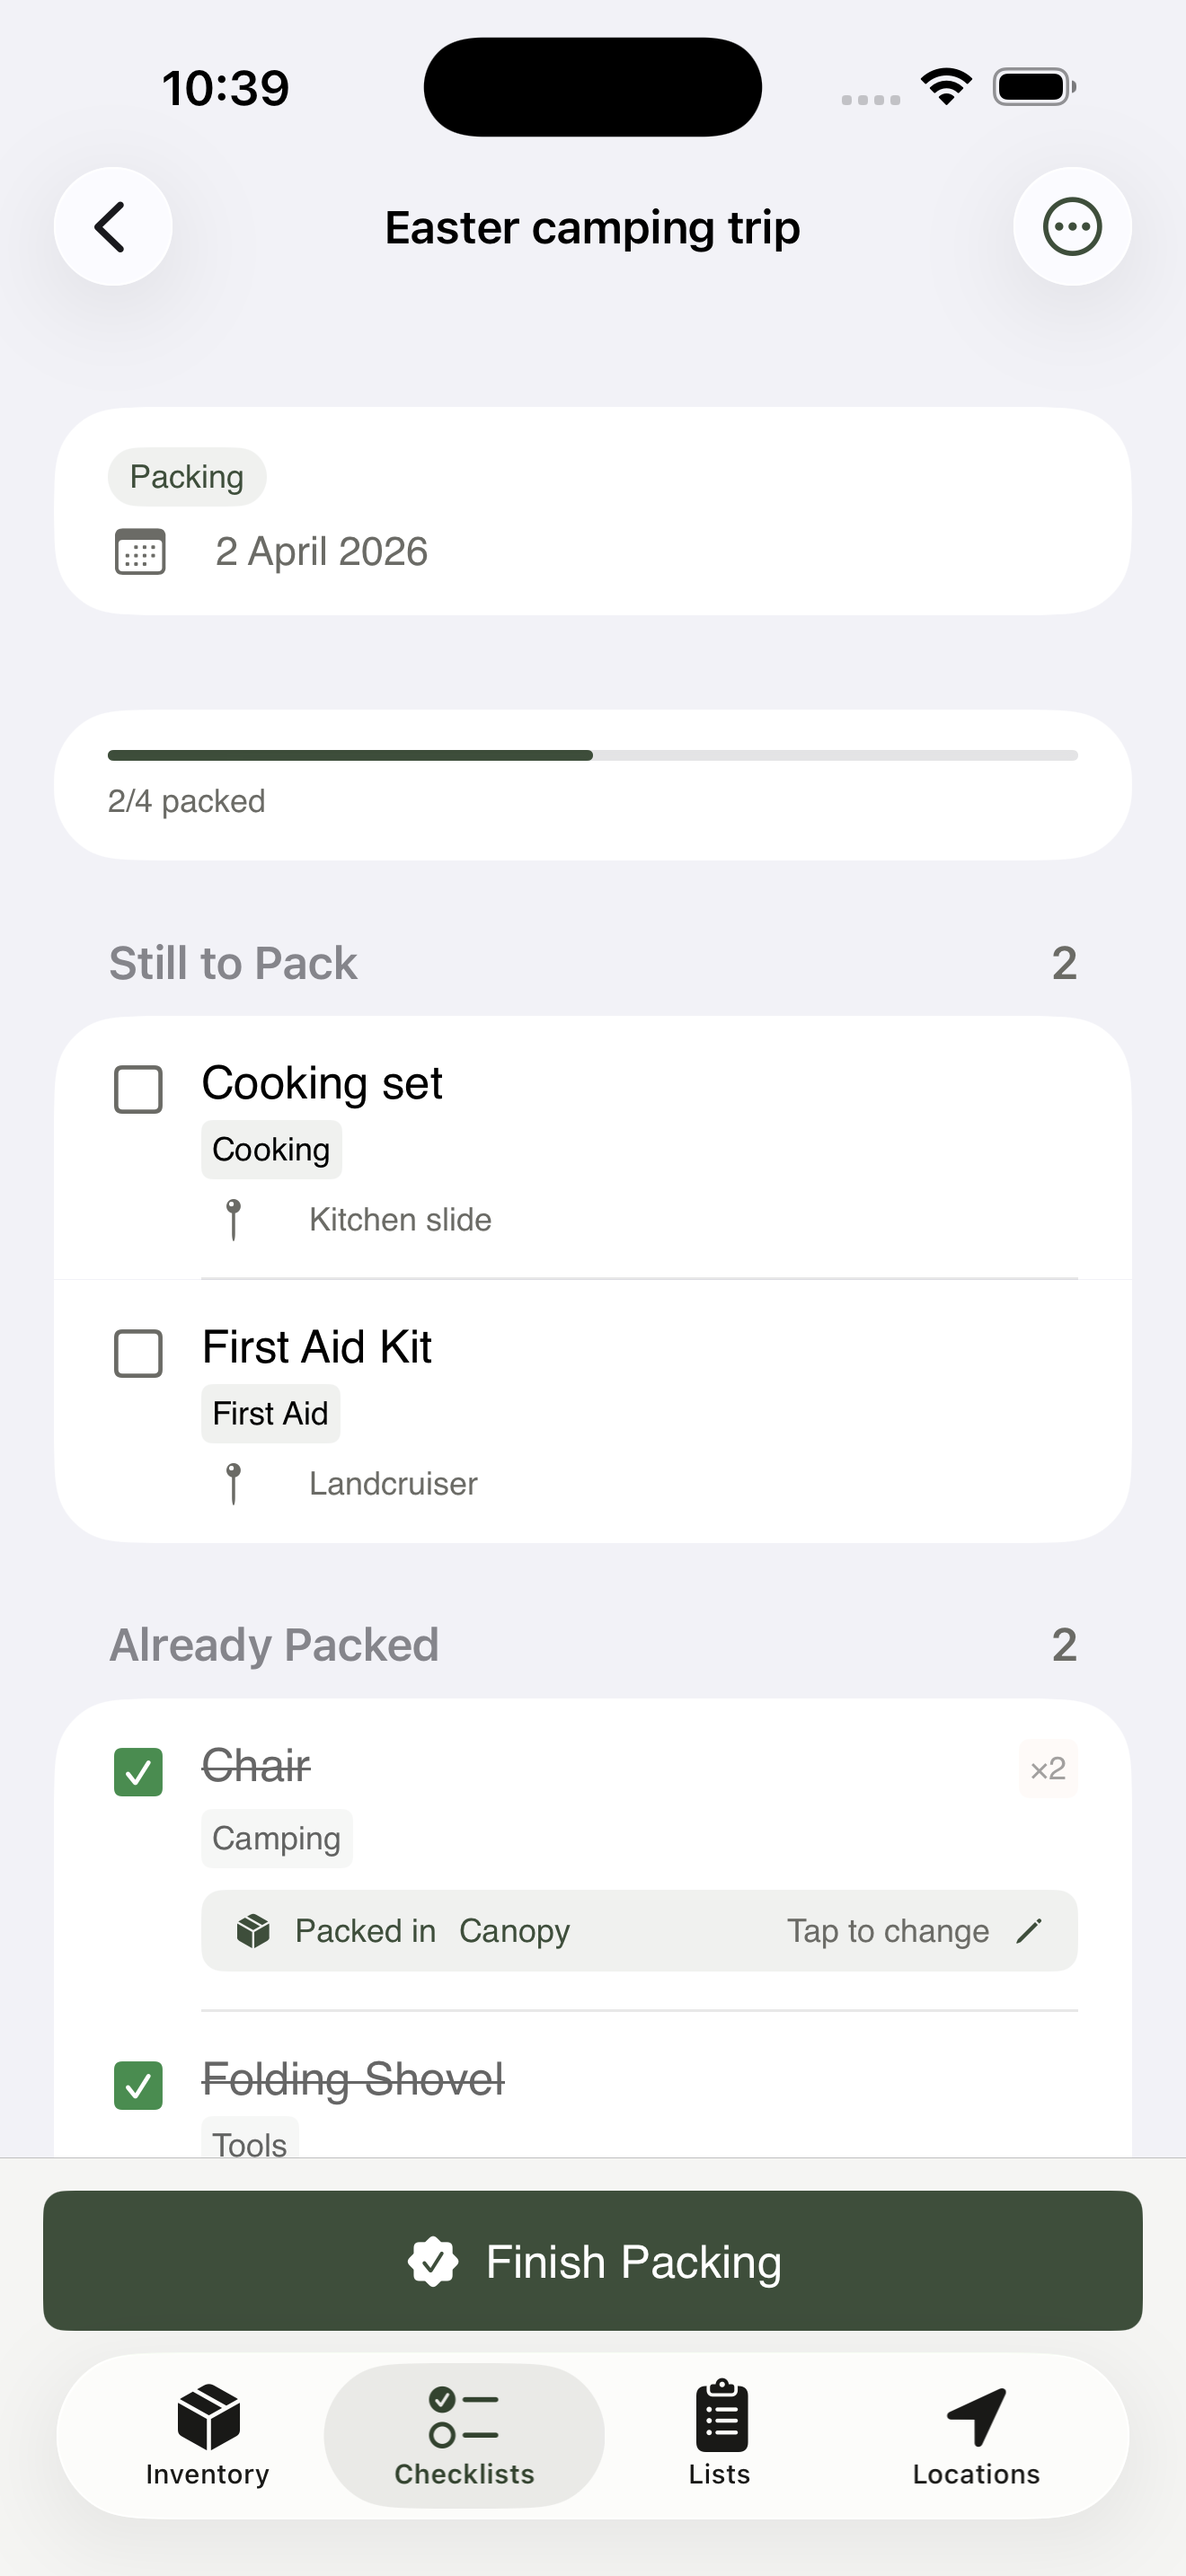
The two stacks fill in as you tick items off — everything starts in Still to pack.
When you mark the checklist complete, GearCache asks if you want to update the locations of the things you just packed. Confirm, and your inventory stays accurate without any manual tracking. That’s the payoff: pre-trip, the inventory does the packing-list work; post-trip, the checklist does the inventory-update work.
That’s the full loop, end to end, in well under five minutes of typing.
What to learn next#
The rest of the help library digs into specific corners of the app:
- Adding & managing items — every field, what each condition means, how search works.
- Locations & hierarchy — building a tree that matches your real-world setup.
- Checklists & smart packing — destination locations, item dependencies, post-trip review.
Or jump straight to the FAQ for the most common questions.