Checklists & smart packing
Updated
Trip checklists that know what you've already stowed.
Checklists are how GearCache pays you back for the inventory work. They’re the part of the app that turns a tree of items and locations into a small, focused list of “what do I still need to put in the car?” — and keeps your inventory accurate after the trip.
Inventory and checklist are the same data#
A traditional packing list is a separate thing you maintain in parallel to your stuff: you write down “tent, sleeping bag, stove” and tick them off, then forget about it until next time.
GearCache flips that. The checklist pulls items straight from your inventory, and every row carries a from {location} hint pointing at where the item actually is right now. So instead of guessing what to bring or where to find it, you sweep through the inventory by category or tag, drop the relevant items onto the trip’s checklist, and the location data tells you where to grab each one from.
You still tick every item off as you load it — the app doesn’t pre-check anything, even items that already live in the trailer. The smart bit isn’t deciding what’s “already packed” for you; it’s making sure that as you tick items off, the inventory keeps up with where each thing has actually moved to.
Creating a checklist#
Open the Checklists tab and tap Add Checklist on the empty state (or + once you have a few). The form asks for:
-
Name —
Easter camping trip,4WD weekend,Sunday day-walk. Whatever you’ll recognise later. - Departure date (optional) — useful for at-a-glance triage in the checklist list.
That’s it — two fields. Save, and the checklist opens, empty and ready to populate.
Adding items#
Tap Add items and browse. You can:
- Filter by category to grab everything in a group at once
- Search by name
-
Filter by tag to pull all the
essentialitems, all thewinterkit, etc.
Each row in the picker (and on the checklist itself) carries a small from {location} line under the item name showing where it currently lives. That makes packing a sweep through the location tree — see what’s coming out of the Trailer, what’s still in the Garage, what’s tucked in the Camping box waiting for a new home.
The split view#
Once a checklist has items, it shows two stacks:
-
Still to pack — the to-do list. Items you haven’t ticked off yet, regardless of where they’re currently stored. Each row carries a
from {location}hint pointing at the item’s current location. - Already packed — items you’ve ticked off this trip. They cross off and pick up a chip showing the location they were just packed into.
Every item starts in Still to pack when you add it to the checklist — even items already living in the trailer. GearCache trusts you to confirm the actual physical state, not assume it. The split view is the running scoreboard, not a pre-calculated answer.
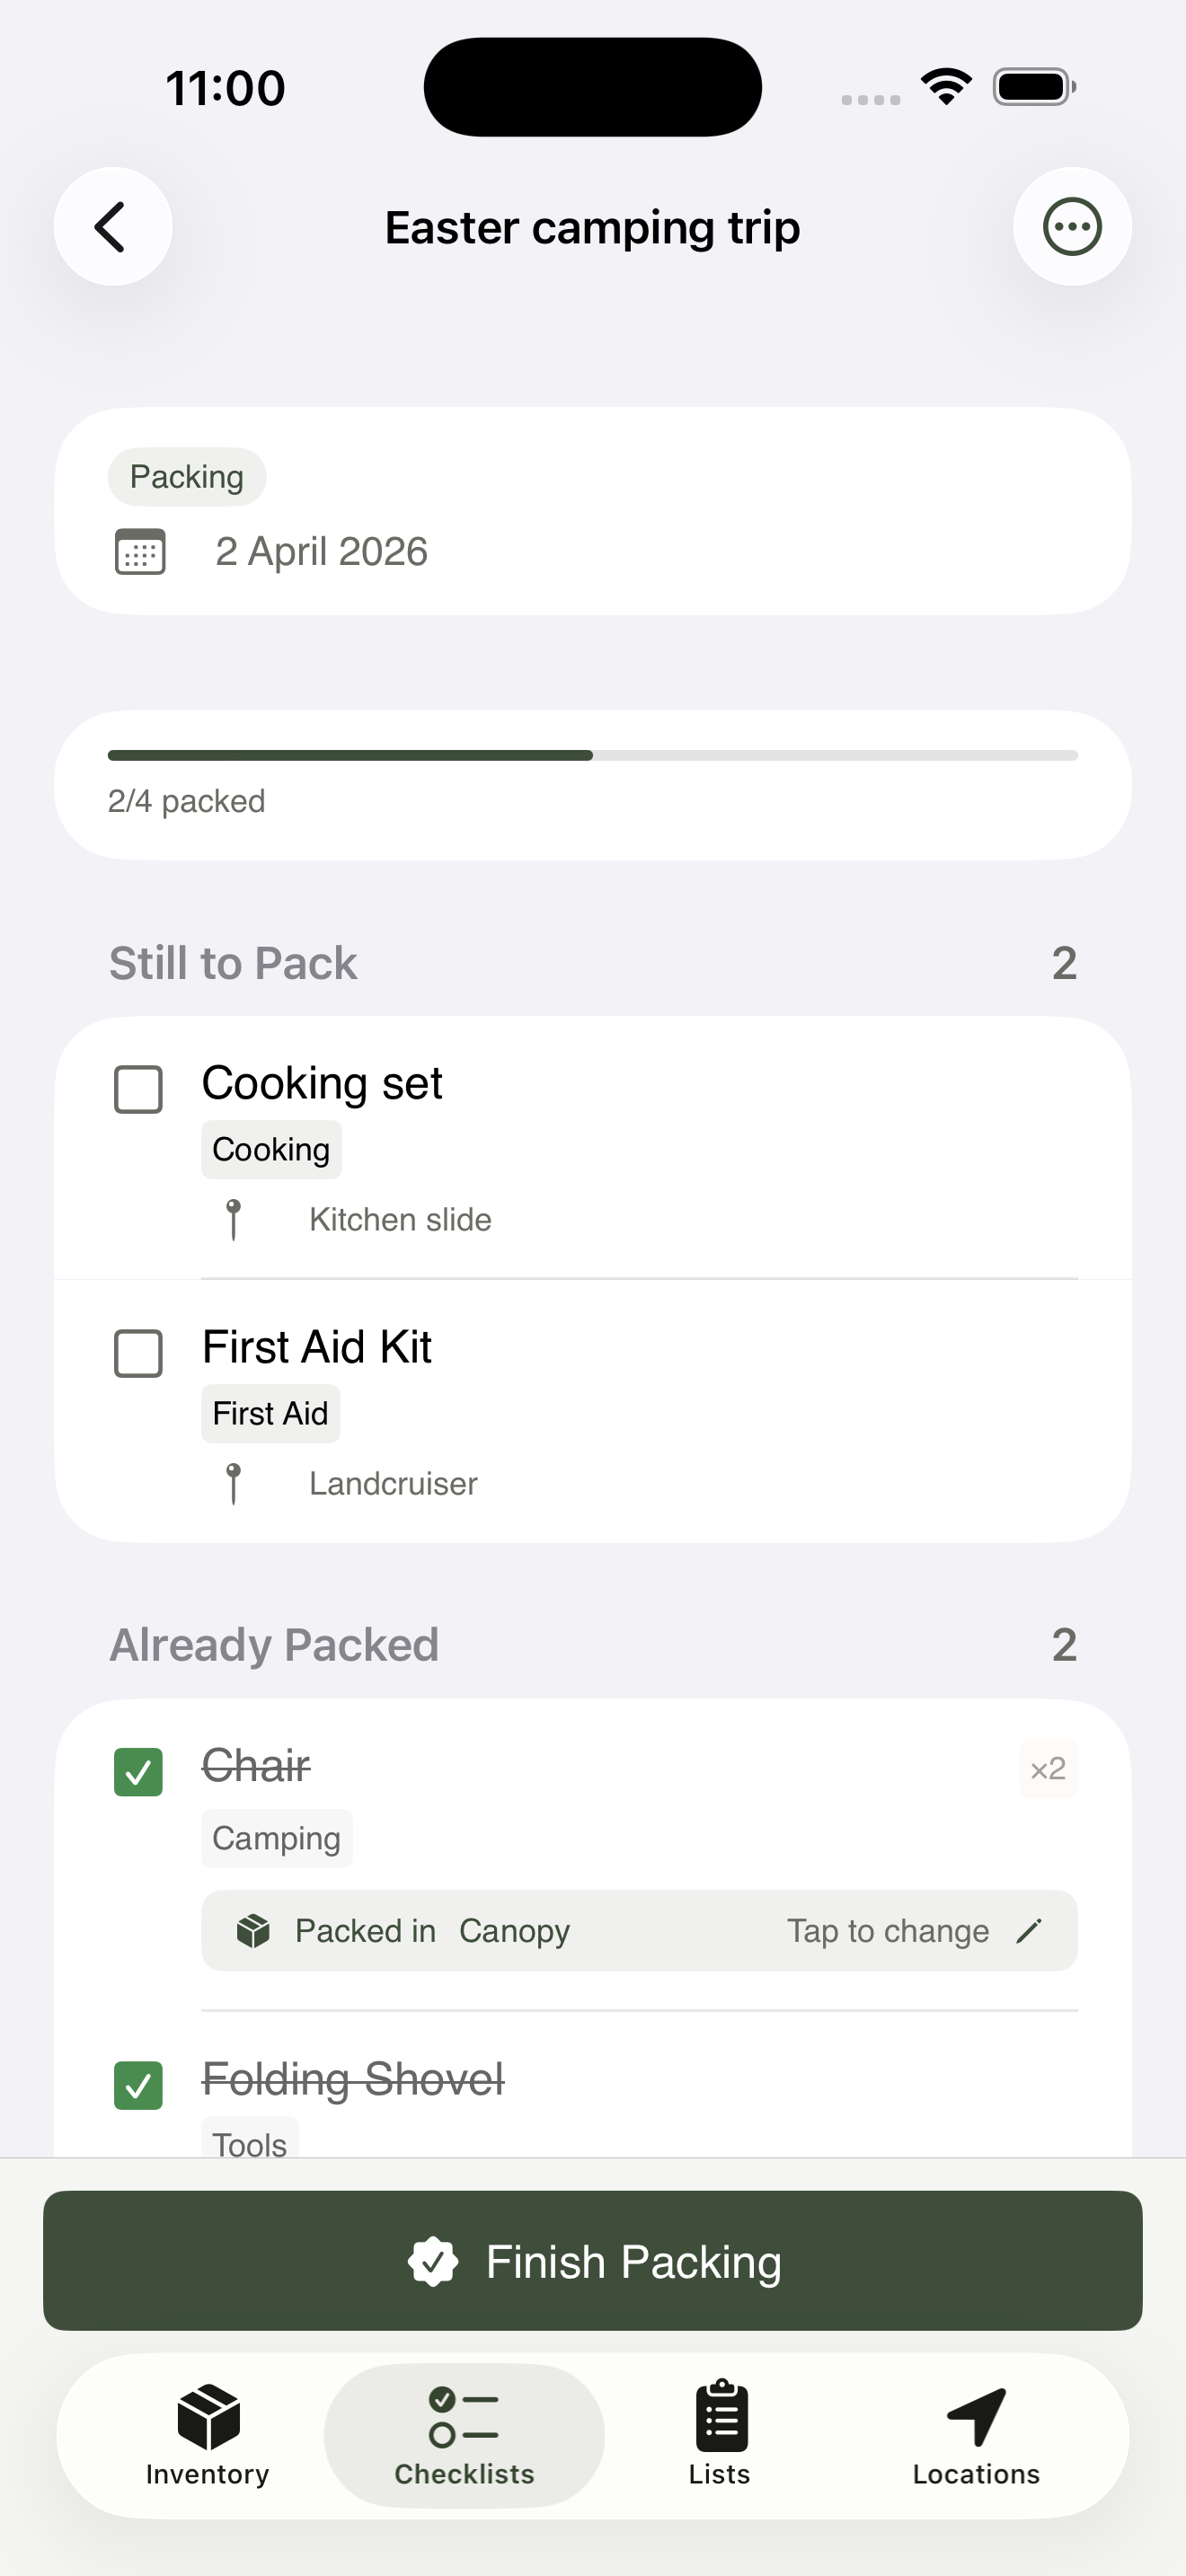
The split view in action — every item starts in Still to pack and moves up as you tick them off.
Checking off as you pack#
Walk through the Still to pack list and tick items off as you load them. The check does two things at once: ticks the row, and (if the item has a default pack location set on its item form) writes that location to the item so the inventory knows where it’s gone for this trip. There’s no separate “do you want to update this item’s location?” prompt mid-pack — that step is folded in.
If an item has no default pack location, ticking the row still moves it to Already packed, but the location stays untouched. The chip on the row shows Set destination instead of a location name; tap the chip to set it for this trip without leaving the screen.
Unchecking an item — if you tick something off and then realise you didn’t actually pack it — reverses both the row tick and the location write. The inventory stays honest.
The batch location update#
When you mark the checklist complete — or open the Done action partway through — GearCache shows the batch location update screen.
It’s the safety net. Items with a default pack location have already had that location written to them when you ticked the box, so they don’t appear here. What does appear: anything you ticked off whose current location doesn’t match its default pack location yet, plus anything where the per-trip chip override differs from where it lives now. For each row you can:
- Confirm all — apply every suggestion in one tap
- Confirm individually — review and approve one by one
- Skip — leave the inventory location alone
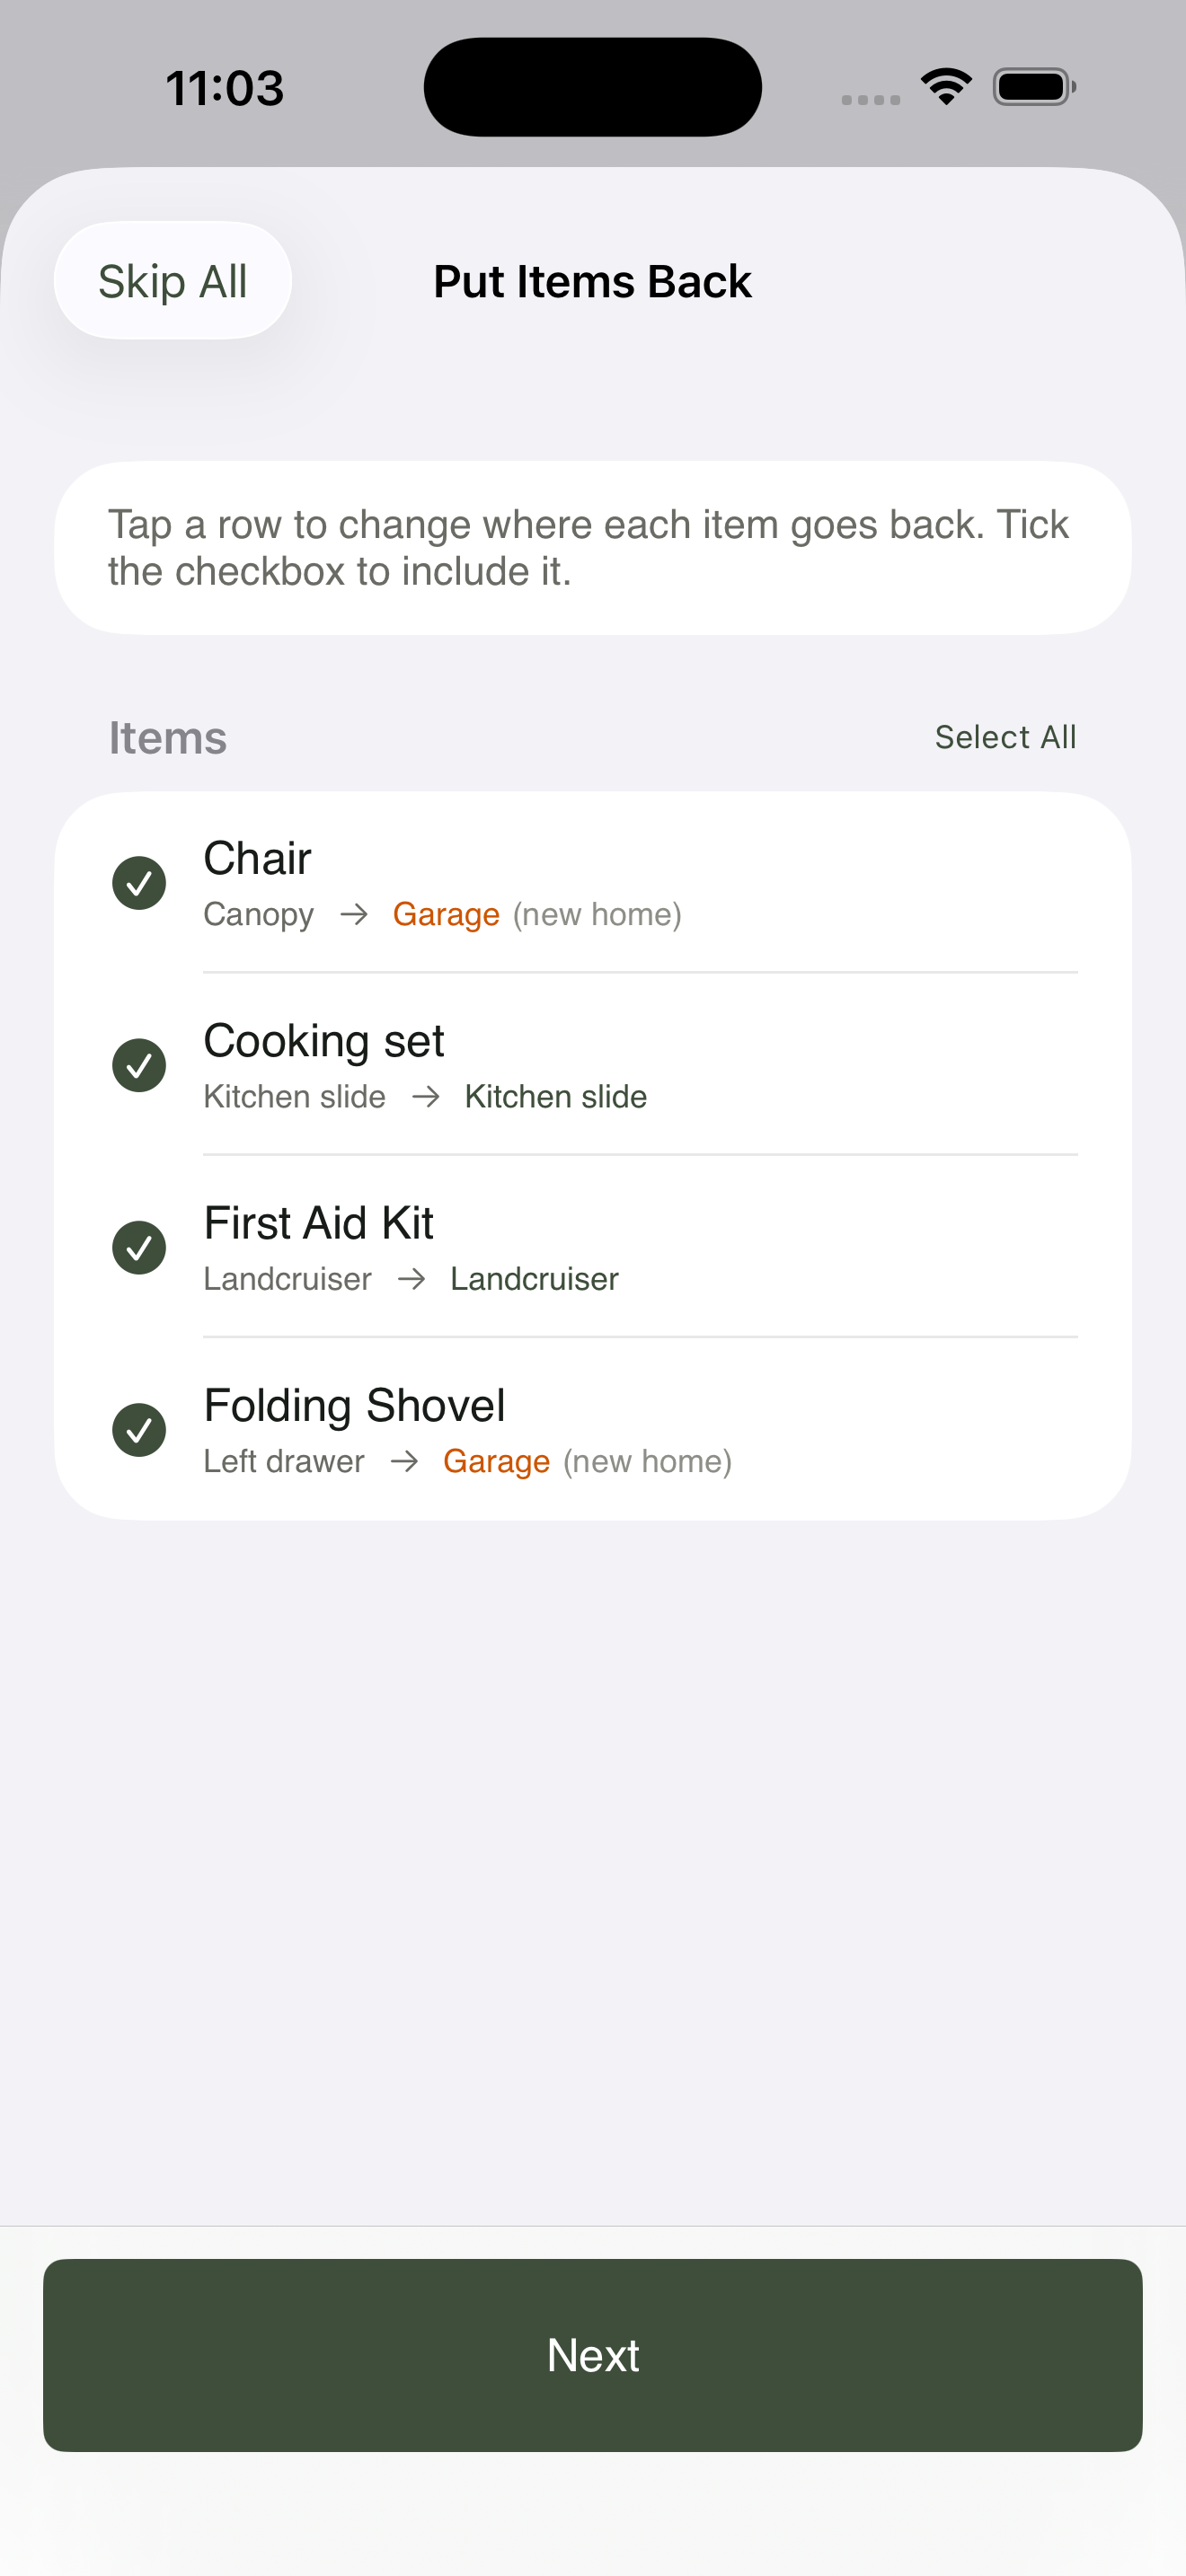
The safety net — anything you ticked off without a default pack location surfaces here for one-tap confirmation.
After this step, the inventory reflects where everything you packed actually is.
Post-trip review#
Open a completed checklist when you get home and tap Post-trip review. The app walks you through unpacking:
- Batch location return — the reverse of the packing flow. The app lists every item that was packed for this trip and suggests its Usually lives in location as where to put it back. Confirm all, individually, or skip.
-
Condition updates — the gas canister is now
consumed, the tent poleneeds_maintenance, the first-aid kitneeds replacementafter the snake bandage came out. Update conditions in one place rather than chasing items across the inventory. - Archive — once the review is done, archive the checklist. It stays searchable but drops out of your active list.
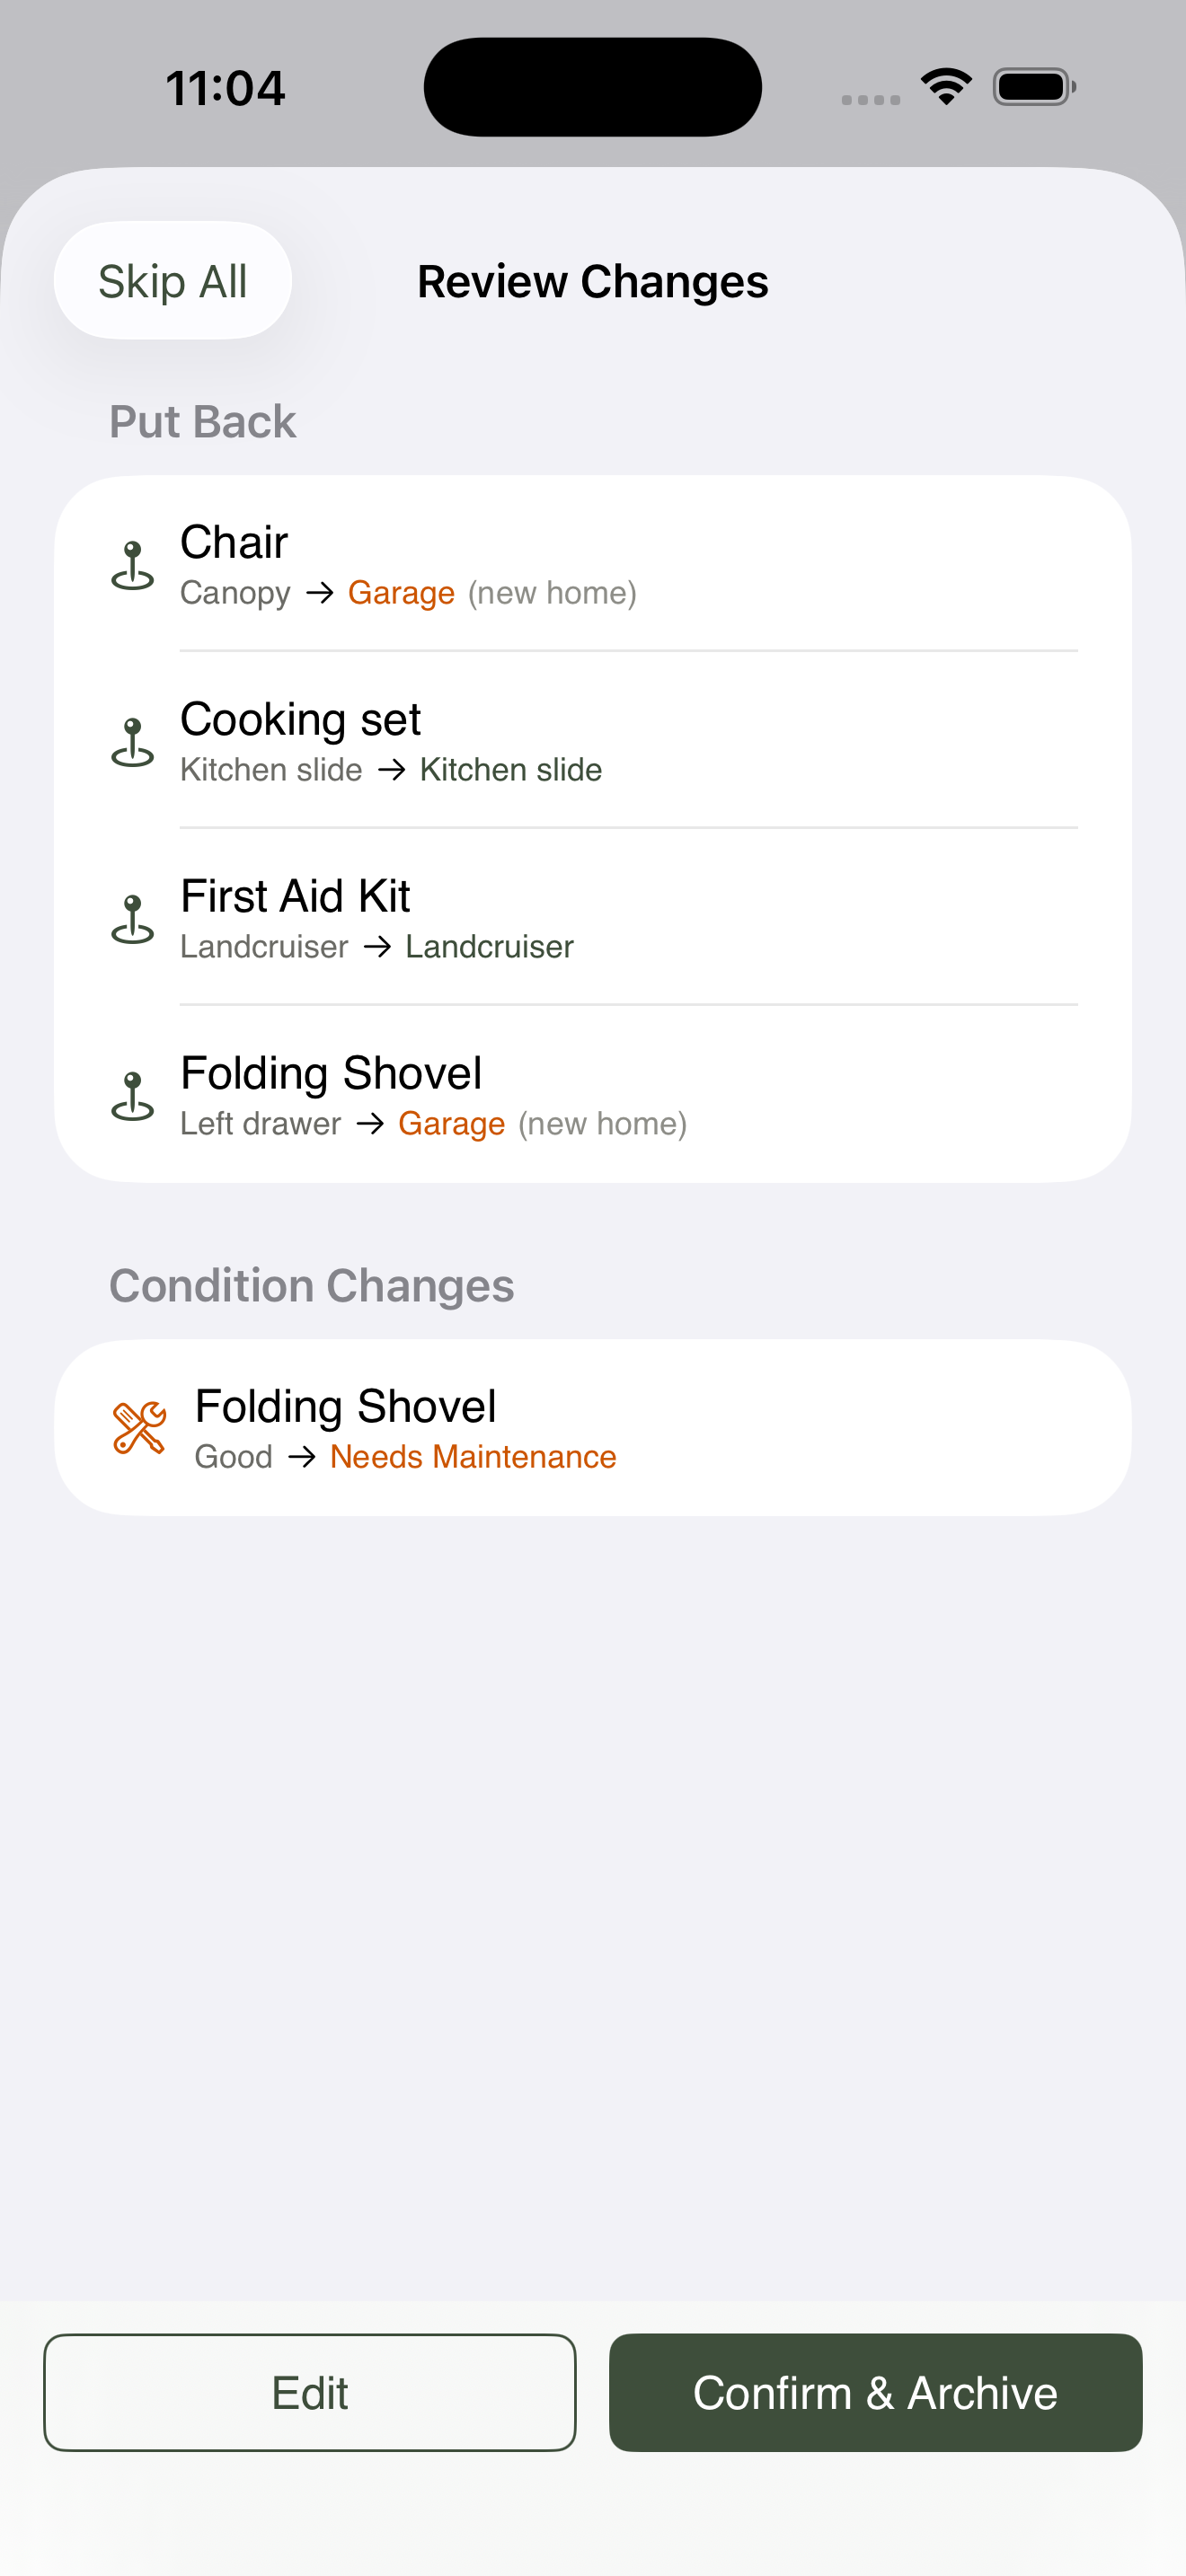
The reverse of the packing flow — confirm where each item goes back to in one screen.
The pre-trip and post-trip flows are symmetric on purpose: every trip starts and ends with a one-screen confirmation that your inventory matches reality.
What to learn next#
- Item dependencies — how to make sure the camp stove never travels without its gas canister.