Photos & attachments
Updated
Capture and attach photos so you remember what each thing actually is.
A photo is the difference between “the green dry bag” and “that green dry bag, with the broken buckle, in the canopy drawer.” GearCache lets you attach up to five photos per item, captured from the camera or pulled from your photo library.
Adding a photo#
Open an item (or start a new one) and find the Photos section.
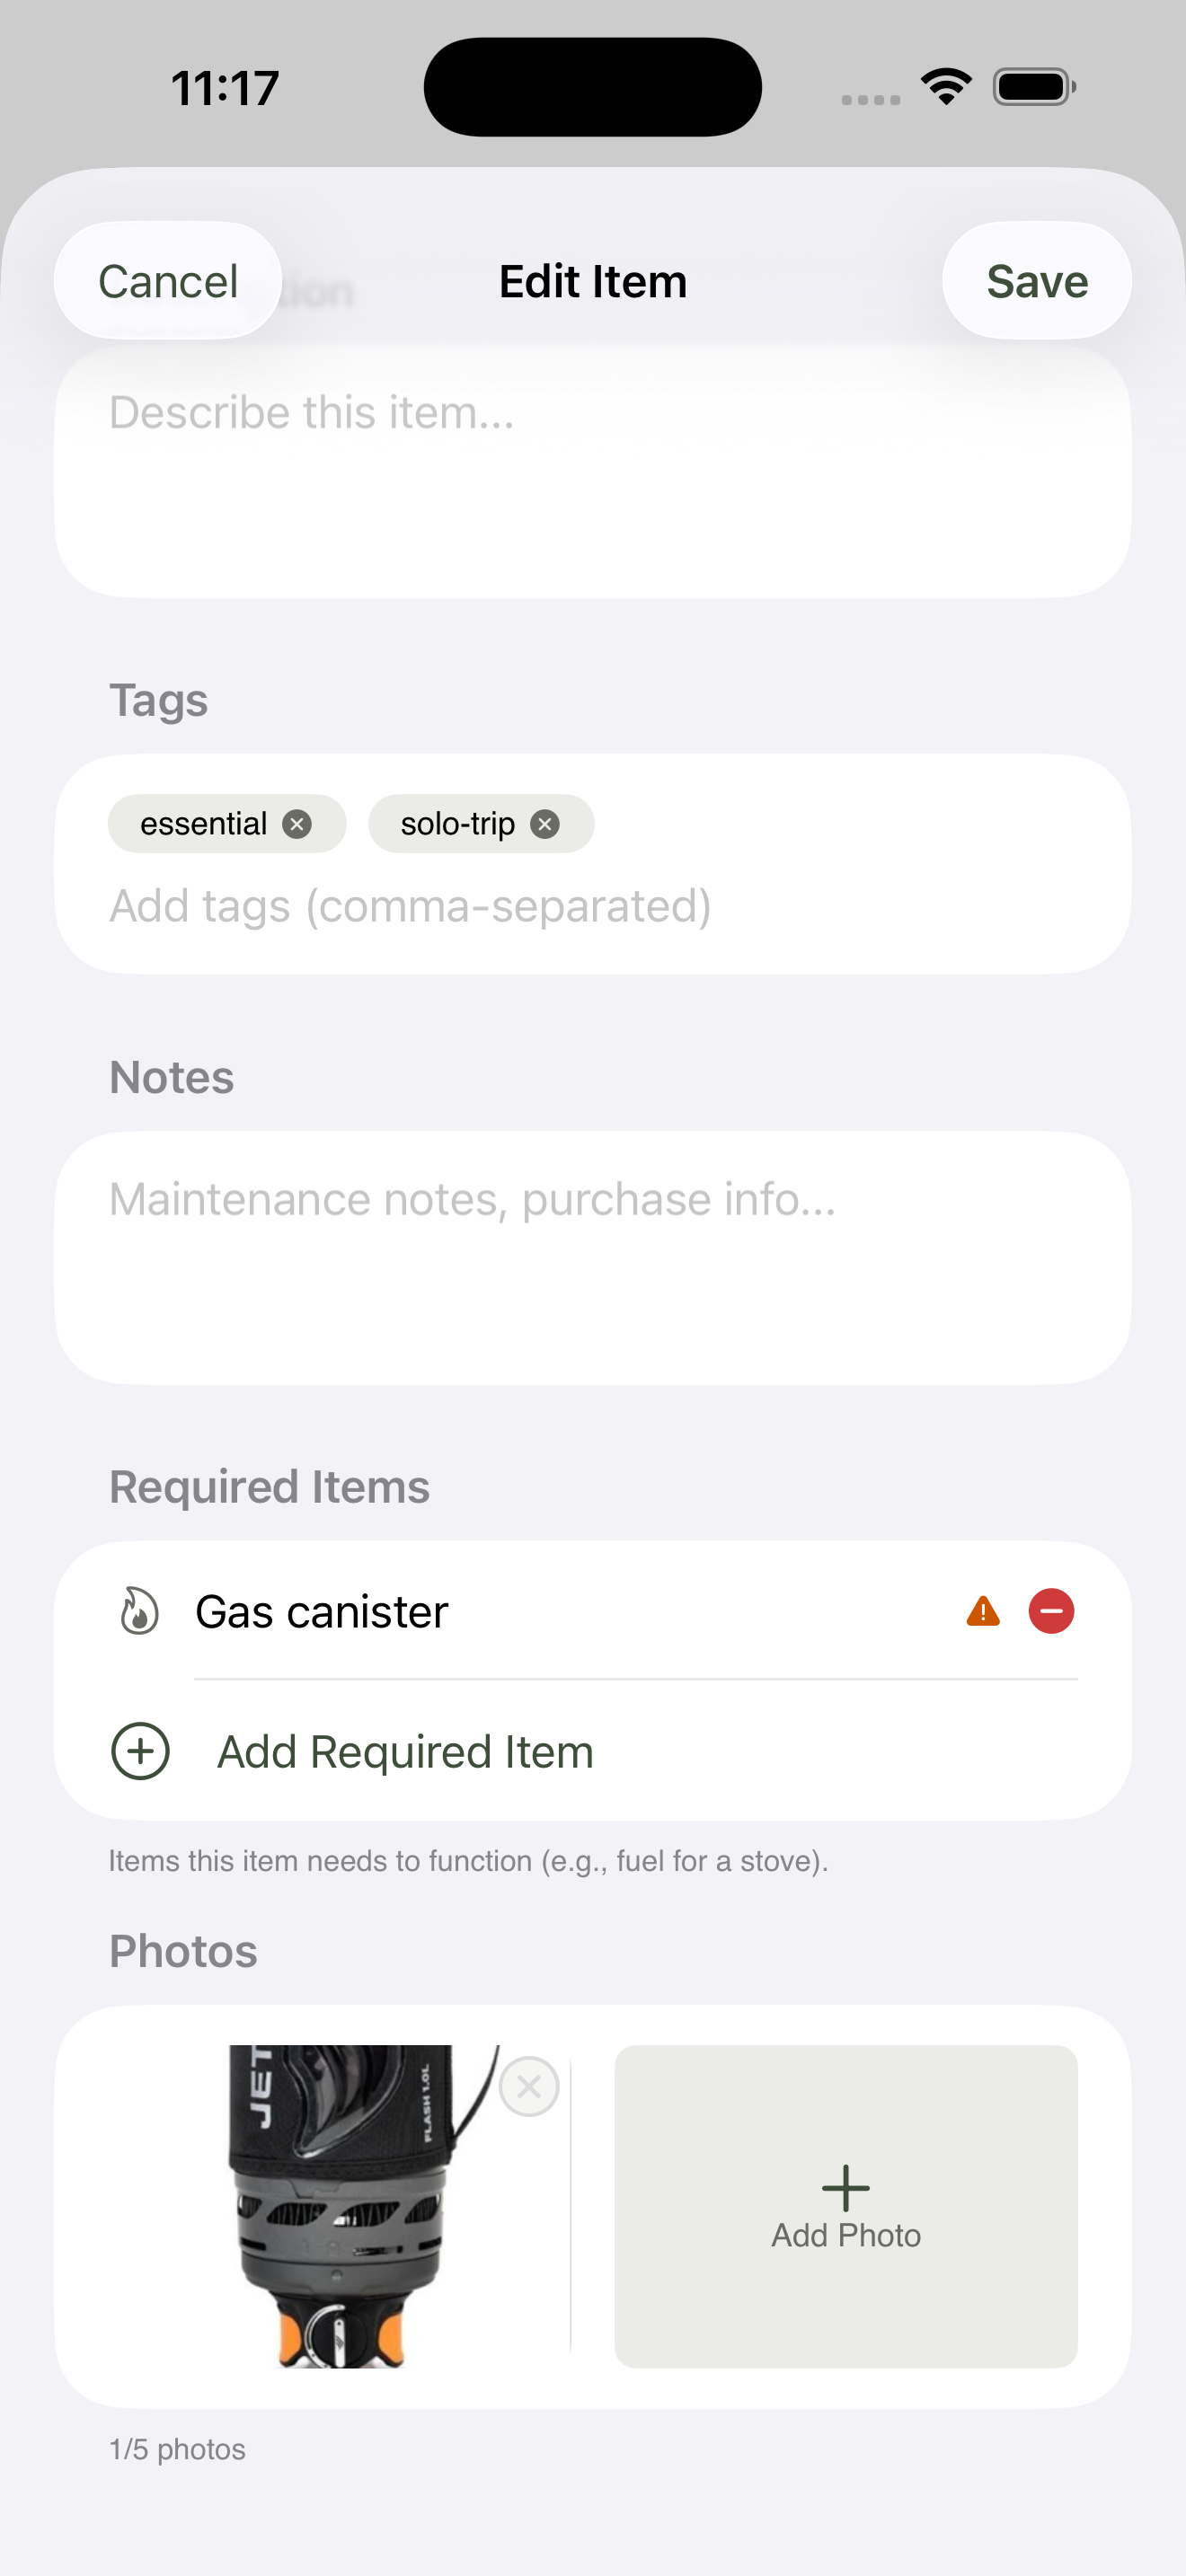
One Add Photo tile, however many photos you’ve added so far, and a small × on each thumbnail to remove it.
Tap Add Photo to bring up a small picker with two options:
- Take Photo — opens the camera inside GearCache for an in-the-field capture. Snap, review, accept; the photo lands on the item.
- Choose from Library — opens your phone’s photo library to pick something already saved. Useful for items you already photographed elsewhere — receipts, manuals, the original product listing. The chosen image is copied into GearCache, so you can delete it from your library afterwards without losing the attachment.
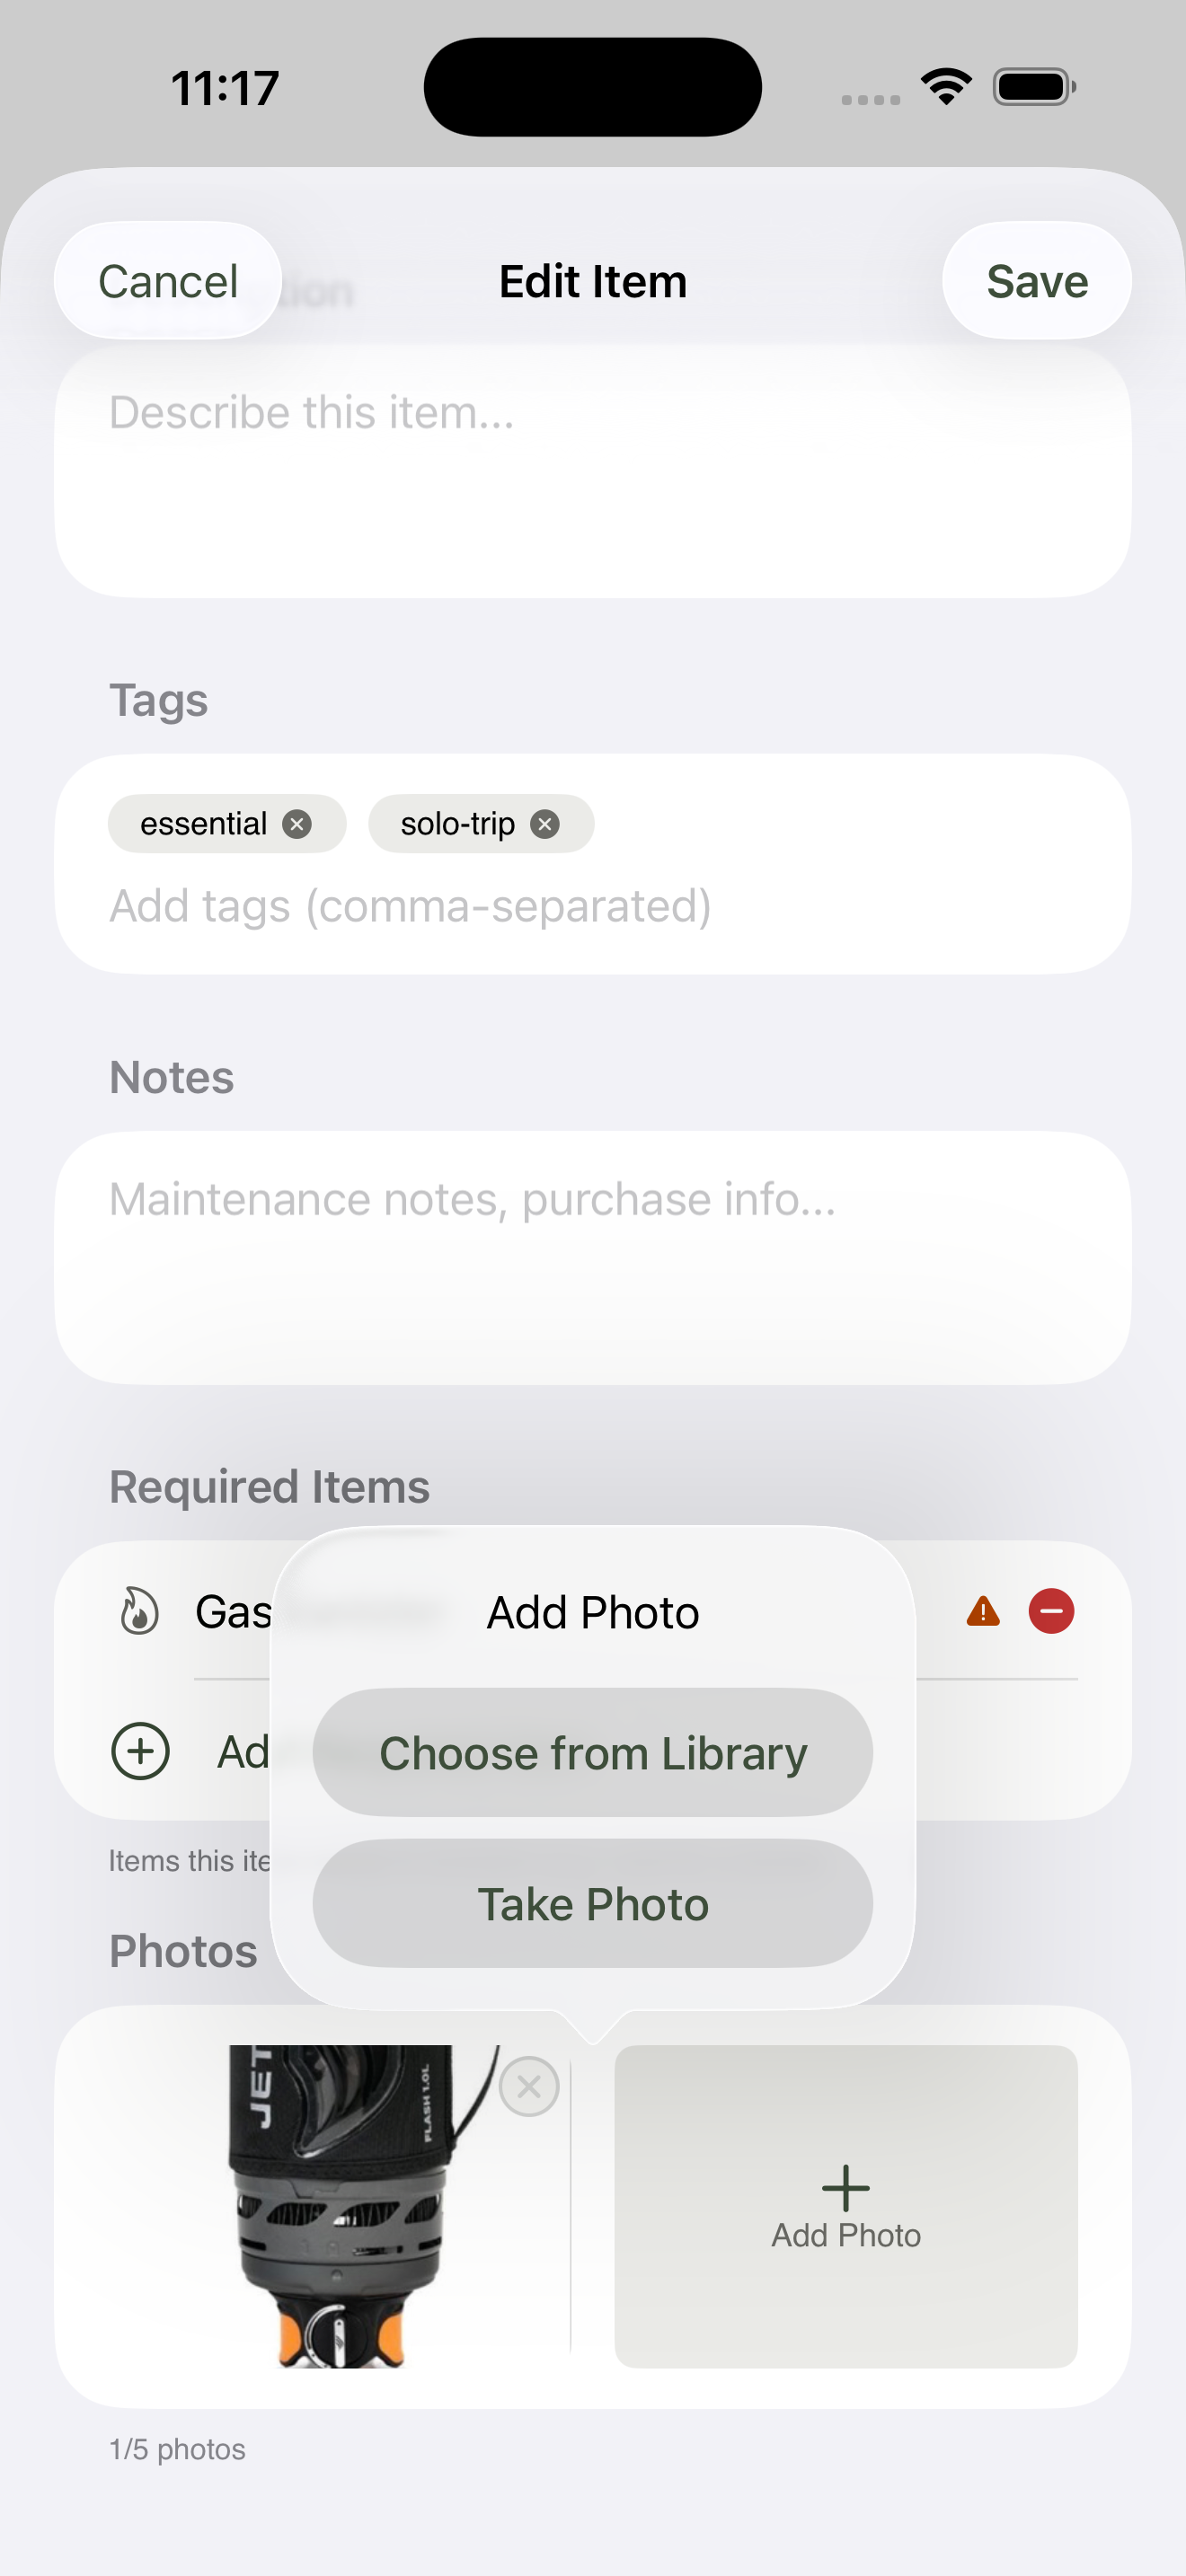
Both routes — camera and library — live behind one tap.
A useful habit: take photos in context, where the item lives. A camp stove sitting in the trailer’s kitchen drawer tells you more than the same stove on a clean kitchen bench. Future-you will be searching for it in a hurry, and the surroundings are half the answer.
Multiple photos per item#
You can attach up to five photos per item. Common patterns:
- Photo 1 — the item itself, clear and recognisable
- Photo 2 — where it lives, with surrounding context
- Photo 3 — a maintenance detail (a frayed strap, a worn O-ring)
- Photo 4 — a label, model number, or serial
- Photo 5 — receipts, purchase date, warranty info
You don’t need to fill all five. Most items only need one. The cap is there so the inventory doesn’t accidentally turn into a photo album.
The first photo on the item becomes the thumbnail shown next to it in the inventory list. Photos are kept in the order you added them — there’s no drag-to-reorder in this version, so to change which photo is “first” you can remove a photo with the × button on its thumbnail and re-add it to push it to the end.
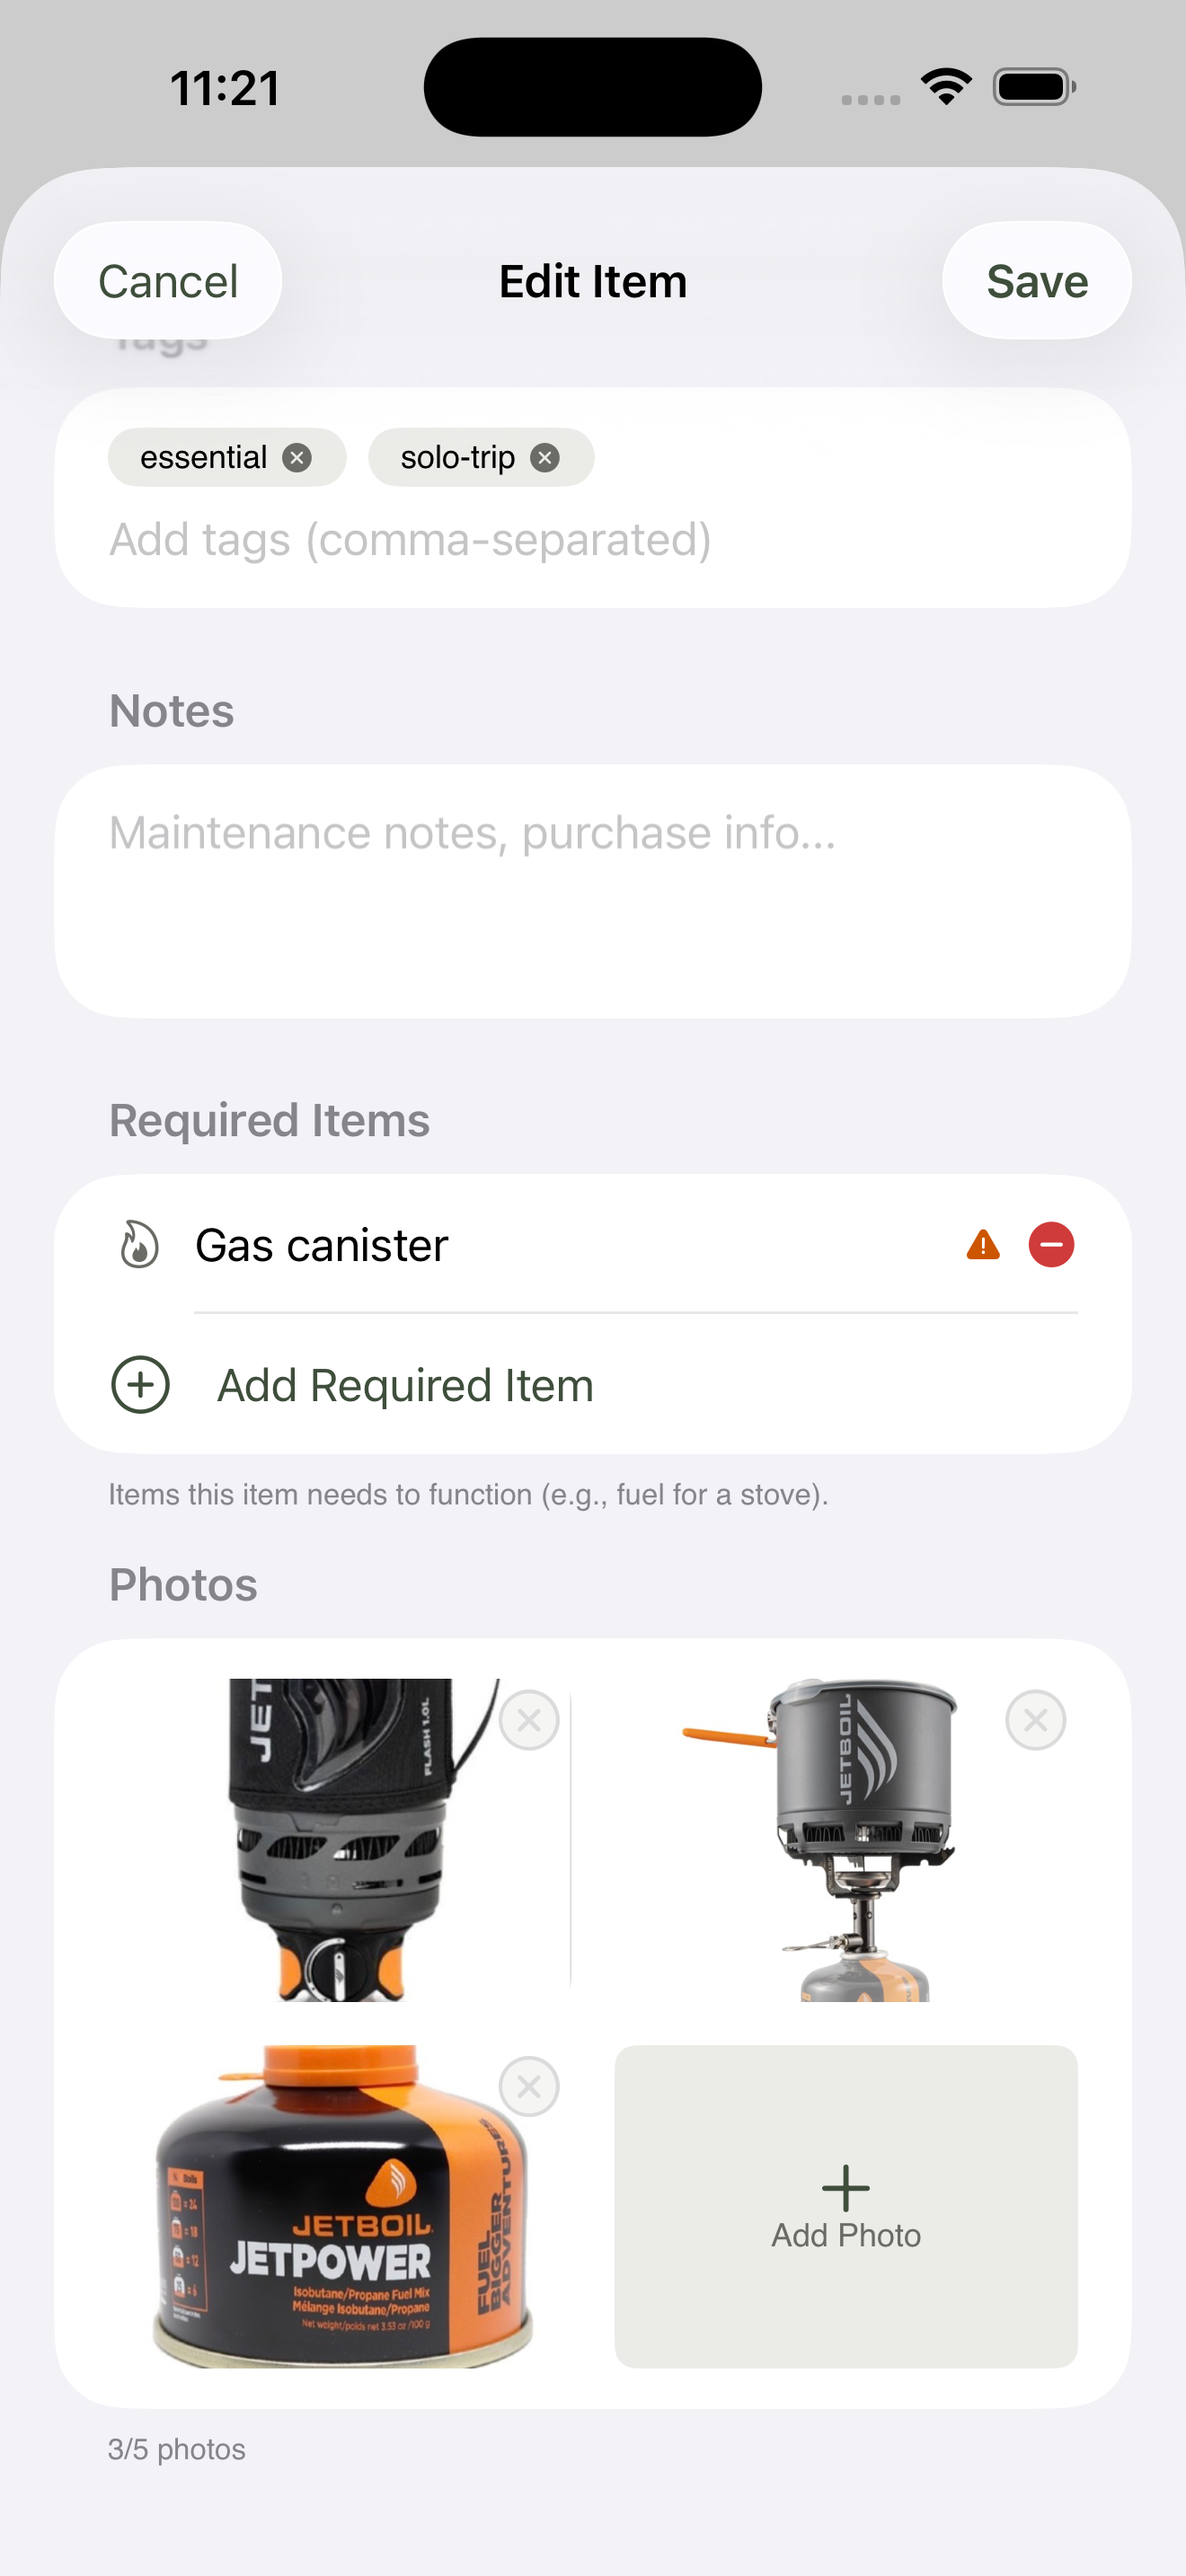
Photos display in add-order; the first one becomes the inventory-list thumbnail.
Viewing and removing photos#
Tap any photo on the item detail screen to open it full-screen. Swipe horizontally to flick between photos; pinch to zoom in. The viewer is read-only — to remove a photo, return to the item form and tap the × button on the thumbnail in the Photos grid. There’s no replace action; remove the one you don’t want and add the new one in its place.
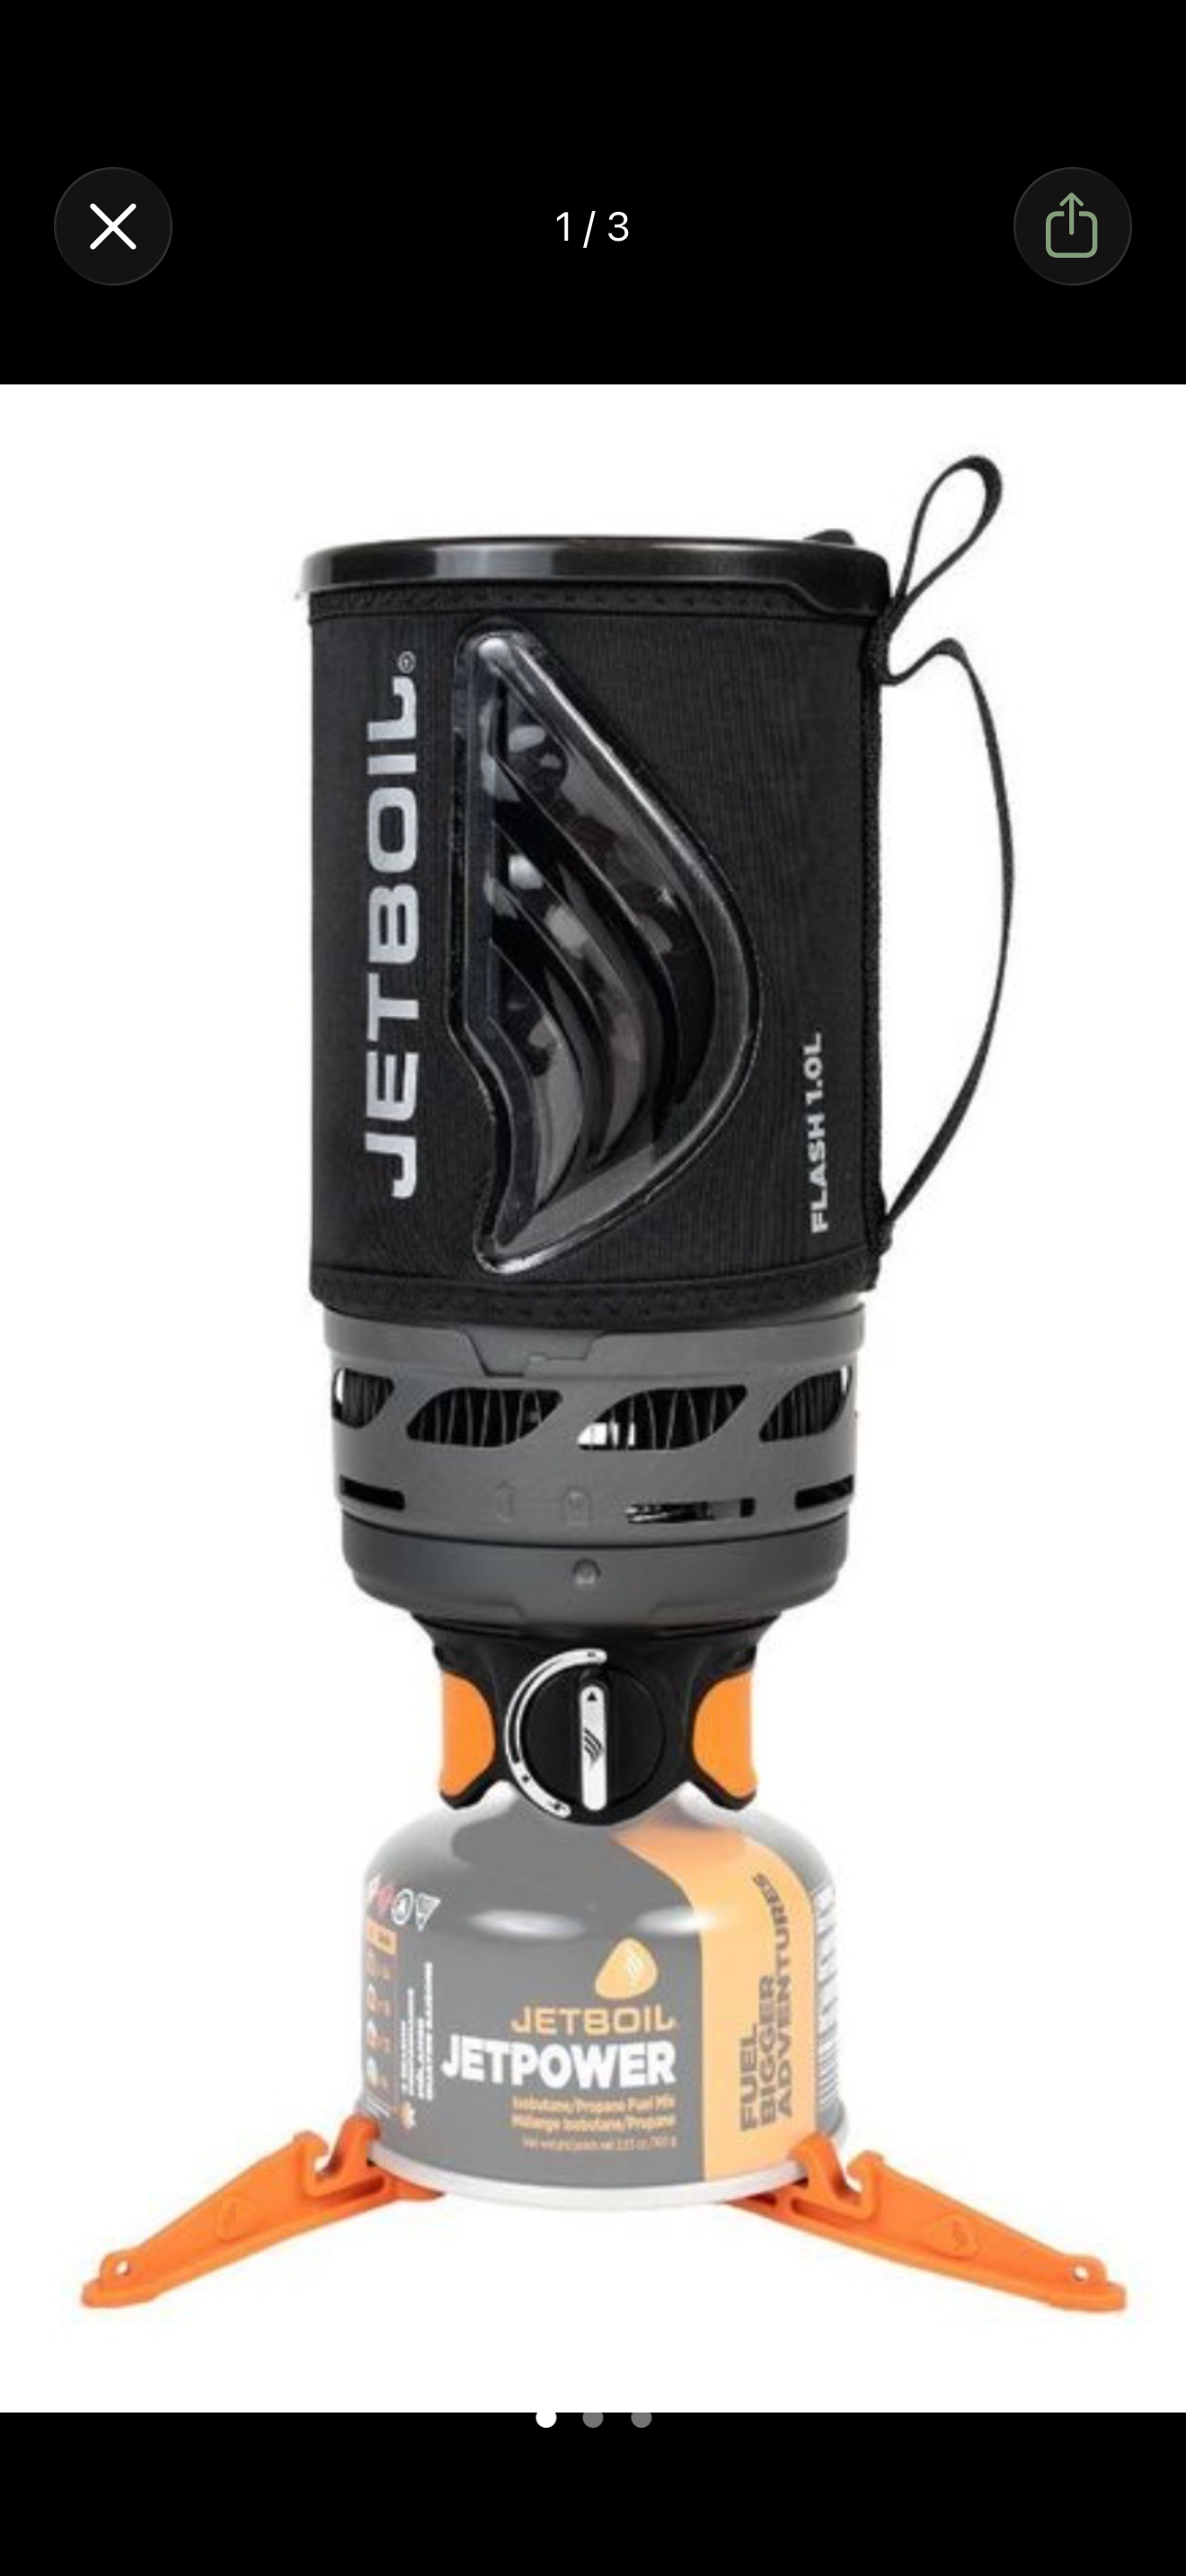
The full-screen viewer is read-only. To delete a photo, return to the item form.
Where photos live#
Photos are stored on your device, in GearCache’s app sandbox. Deleting an item removes its photos with it. Deleting GearCache removes everything — photos included — so if you want to keep a photo independently, save a copy to your camera roll first.
What to learn next#
- Adding & managing items — see where photos sit in the full item form.